Working with Microsoft Azure RemoteApp
Terminal Server
Using RemoteApp While Mobile
If you visit the RemoteApp website from a tablet or smartphone, the link Install Client automatically refers you to the appropriate app in the respective app store; in the case of Apple iOS, it connects to the Microsoft Remote Desktop [5]. The app has built-in support for Azure RemoteApp. After installing, click the + symbol at the top right of the screen in the app, select Add Microsoft RemoteApp , and log in. You can then also access your applications from the mobile client (Figure 3).
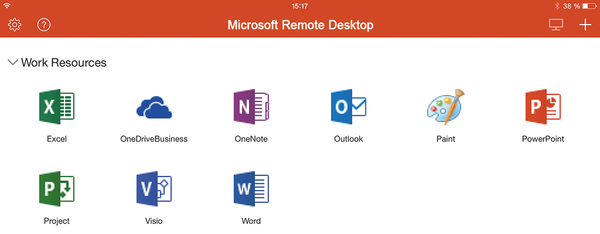 Figure 3: The mobile Remote Desktop Client comes with built-in support for Azure RemoteApp.
Fine Tuning
Back on the Azure website, you will see an overview about the use of your RemoteApp collections. Access the detailed view of a collection and then the Dashboard . There, you will see how your users are coping with the quota of hours and what the bill is for the current month. You can grant other Microsoft accounts, or even accounts from your own Active Directory, access on the User Access page.
On the Publishing page, you can control what apps the collection contains. You will find the Publish button at the bottom of the screen. Here, you have the choice either to enter a path to the desired app specifically or to choose from the apps linked in the image's start menu. In the first case, however, you need to know the path because you cannot browse in the image's filesystem. You can use the Edit option to transmit command-line parameters to an already published application. Finally, you can also Unpublish an app again.
On the Sessions page, you can see all the users currently connected with the collection. You can log off or disconnect from individual sessions or send a message to an individual user or all users. The well-known option from the classic Remote Desktop Services of mirroring a session for assistance and troubleshooting is unfortunately missing here. Likewise, it is not possible to start a desktop session as an administrator on the terminal server. On the Scale page, you can switch between the Basic and Standard plans, as required.
Creating Your Own Image
If you want to publish both Microsoft Office and your own applications, the way to do so this is through your own image. The Azure help contains a detailed guidebook [6]. To create an image, you will need the Hyper-V role from Windows 8.1 or Windows Server 2012 R2 as a host. Windows Server 2012 R2 only comes into question as a guest system.
Because Azure still does not understand the newer VHDX format for image files, the first step is to create a VHD file using Windows disk management. This can be dynamically expanding – which shortens the upload to the cloud later – and uses the MBR partition style.
Then, create a new VM in the Hyper-V manager that uses this virtual disk and boots from the Windows Server 2012 R2 image. Install the operating system and then the Remote Desktop Services. Do not use the option Remote Desktop Services installation in the wizard for installing role services; instead, use the conventional Role-based or feature-based installation . You only need the role service Remote Desktop Session Host and the feature Desktop Experience , including all dependencies that the wizard automatically resolves. Now, you can install all the applications you want to publish.
Buy this article as PDF
(incl. VAT)
Buy ADMIN Magazine
US / Canada
UK / Australia
Related content
-
Private cloud with Microsoft Azure Stack
 Azure Stack is an Azure extension that implements an on-premises data center for consistent hybrid cloud deployments.
 -
The Azure Arc multicloud and on-premises management platform
 The Azure Arc cloud service supports centralized management of Windows and Linux servers, Kubernetes clusters, and SQL servers that are not themselves running in Azure, extending Azure management capabilities to servers in traditional data centers or any other cloud environment. We show you how to get Azure Arc up and running and look at its key features.
 -
Azure Sphere for Internet of Things
 Microsoft Azure Sphere links three vital elements of the Internet of Things – microcontrollers, software, and cloud service – with a focus on security.
 -
Putting an Active Directory domain controller in the Azure cloud
 Once you start putting services in Azure cloud, you might want to add an Active Directory domain controller.
 -
Automating the Azure infrastructure using a command-line interface
 When it comes to merging the cloud with local resources, Azure offers some useful automation tools.
Subscribe to our ADMIN Newsletters
Subscribe to our Linux Newsletters
Find Linux and Open Source Jobs
Most Popular
Support Our Work
ADMIN content is made possible with support from readers like you. Please consider contributing when you've found an article to be beneficial.
