« Previous 1 2 3 4 Next »
Automating development environments and deployment with Otto
Ottomatic
Setup Work
To help you get started with Otto, HashiCorp provides the source code of the simple web application shown in Figure 1. You can either download this directly from GitHub [10], or use git to check it out:
git clone https://github.com/hashicorp/ otto-getting-started.git
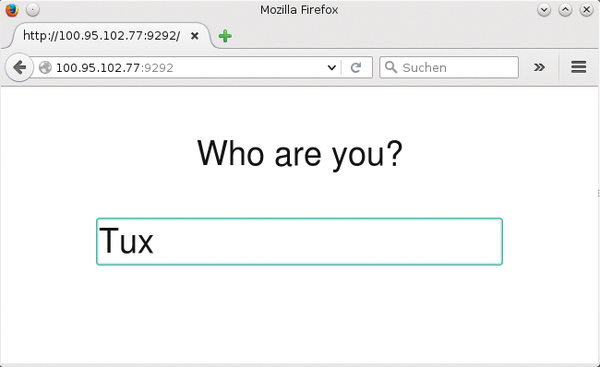 Figure 1: The web application provided by the Otto developers fields a name and simply outputs it again.
Because the web application is written in Ruby, developers would now normally fire up the package manager and install the complete Ruby system along with a web server and all the required dependencies. With Otto, however, you simply change to the web application's project directory and run two commands when you get there:
cd otto-getting-started
../otto compile
otto dev
The first command tells Otto to have a look at the source code and retrieve all the information necessary for setting up the development environment (Figure 2).
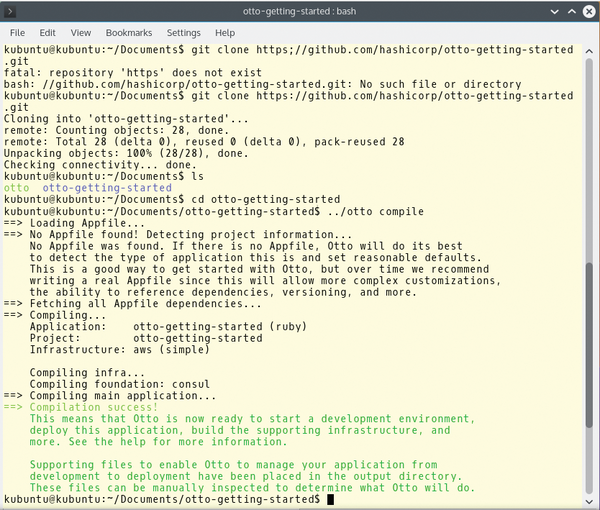 Figure 2: Otto is extremely chatty. In the first step executed here, the tool has discovered that the current working directory contains a Ruby program.
The tool autonomously discovers that it is a Ruby program and accesses the gemfile typical of Ruby applications to load all required libraries or dependencies. Otto stores the information retrieved in this way below the project directory in a hidden directory named .otto. It merely contains configuration files for the tools harnessed by Otto, which explains why normal Otto users are better off not making any changes here.
Everything In Place
Once Otto has collected the information it needs, the otto dev command creates the development environment. For this to happen, Otto tells Vagrant in the background to set up a matching virtual machine with VirtualBox (Figure 3). If Vagrant is not available, Otto offers to download the tool itself. This didn't work in version 0.1.2, even though the Otto documentation suggests that it should. As a result, budding Ottomans have no alternative but to install Vagrant manually, as mentioned earlier.
 Figure 3: With the help of Vagrant, Otto creates a virtual machine with a miniature Ubuntu, sets up SSH access, then installs the required software.
If Otto was able to launch Vagrant, Vagrant then downloads a basic image of approximately 350MB and uses this to create a complete virtual machine. The first call to otto dev can thus take a couple of minutes. In our lab, the basic image contained a minimal version of the more than three-year-old Ubuntu 12.04 LTS Precise Pangolin – although this version is still supported until April 2017.
To facilitate the process of sending data to the virtual machine, Otto then installs the VirtualBox Guest Additions, version 4.2.0. Although these tools are designed for collaborating with VirtualBox 4.2.0, they work perfectly with newer versions. Otto hides any error messages that occur under a heap of status messages, so it could be quite worthwhile to inspect the messages closely.
In the next step, Otto transparently mounts the project directory for the web application on a virtual machine. Any changes made to the web application are thus immediately available on the virtual machine and vice versa. After this, Otto installs the Consul [11] tool on the virtual machine, making it easier to find and address databases and other services. (More on that later.)
Otto now sets up the required programming tools; in this example, it installed Ruby, among other things. In the case of a PHP application, Otto would install both the Composer package manager and frequently used PHP modules (mcrypt, fpm, gd, readline, pgsq, and mysql, but only mysql, mind you, not the database).
Access All Areas
At the end of the installation process, you have a virtual machine running in the background with your development environment. In a final fling, Otto summarizes all the important information and possible restrictions (Figure 4). In the case of the Ruby application, the developer needs to install the Ruby gems manually, but at least Otto has completed all the required preparations. All you need to do is type
otto dev ssh
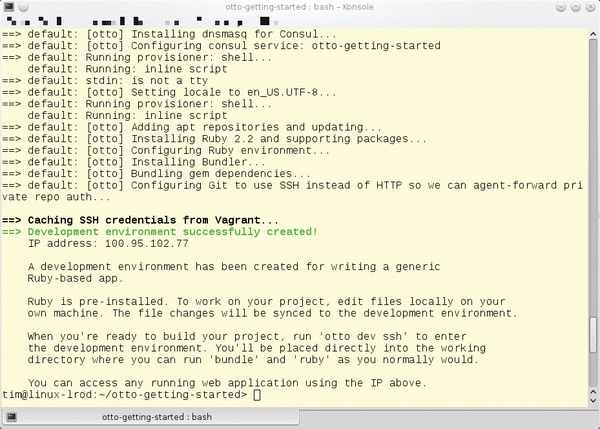 Figure 4: When done, Otto shows the tools available on the virtual machine in the form of a brief summary.
to change to the virtual developer environment. As the command would suggest, access is encrypted using SSH. Otto takes care of logging you in, after which you find yourself in the project directory (Figure 5).
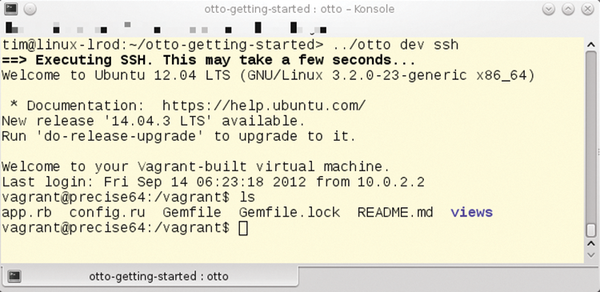 Figure 5: After typing otto dev ssh, you are taken to the virtual machine, where Otto displays the project directory. You can then work there directly with the original source code instead of using copies.
You now retroactively need to pick up the Ruby gems required by the application; you can use bundle to do this. After doing so, you can fire up Ruby's own web server on a virtual machine by typing:
rackup --host 0.0.0.0
The server listens on port 9292 by default. For the PHP program, the equivalent command would be:
php -S 0.0.0.0:5000
Port 5000 is used here. Each virtual machine (i.e., each development environment set up by Otto) has its own IP address. You can now use this address specifically to access the web application, which is now running. Otto tells you the IP address in the last lines when setting up the development environment (Figure 4). Forgetful users can also open a second terminal, change to the project directory and type:
otto dev address
In the case of the small example application, all you need to do is call the IP address shown in the browser with a port number of 9292. As shown in Figures 1 and 4, this would be http://100.95.102.77:9292 .
You can now continue working on your web application in the normal way on your own machine. Because the project directory is passed through, changes take effect directly in the development environment, and you should be able to reload the page in the browser. If you need to interrupt your work in the evening, you can shut down the development environment gracefully by typing otto dev halt, and fire it up again the next day by typing otto dev.
« Previous 1 2 3 4 Next »
Buy this article as PDF
(incl. VAT)
Buy ADMIN Magazine
US / Canada
UK / Australia
Related content
-
Vagrant, Serf, Packer, and Consul create and manage development environments
 Four open source tools – Vagrant, Serf, Packer, and Consul – facilitate a developer's work by each handling one specific task elegantly.
 -
Docker and Podman environments on Windows and Mac machines
 Develop container applications on a Windows or Mac system with Docker Desktop or Podman.
 -
Magnum: Exploring OpenStack's Container API
 The Magnum project brings Docker container technology to the OpenStack cloud.
 -
Automated orchestration of a horizontally scalable build pipeline
 A Jenkins build pipeline frees developers from repetitive manual build tasks by facilitating automation and provides broad traceability with continuous logging and feedback.
 -
Setting up DevOps Orchestration Platform
 DevOps Orchestration Platform open source framework was developed in Golang and can be used to bootstrap an IT infrastructure dynamically or import details of an existing IT infrastructure locally on VirtualBox or in the Cloud.
Subscribe to our ADMIN Newsletters
Subscribe to our Linux Newsletters
Find Linux and Open Source Jobs
Most Popular
Support Our Work
ADMIN content is made possible with support from readers like you. Please consider contributing when you've found an article to be beneficial.
