
Lead Image © Rgbspace, Fotolia.com
Exploring the Relax and Recoverbackup and rescue system
Relax
A professional recovery system is much more than a simple backup tool. Experienced admins know they must control and test the entire workflow for the recovery process in advance, so they are certain all the pieces will fall into place in case of an emergency. Versatile replacement hardware must be readily available, and you might not have the luxury of using a replacement system that exactly matches the original. The partition layout or the configuration of a RAID system must correspond. If the crashed system's patch level was not up to date, or if the system contained an abundance of manually installed software, problems are likely to occur with drivers, configuration settings, and other compatibility issues.
Relax and Recover (ReaR) [1] is a true disaster recovery solution that creates recovery media from a running Linux system. If a hardware component fails, an administrator can boot the standby system with the ReaR rescue media and put the system back to its previous state. ReaR preserves the partitioning and formatting of the hard disk, the restoration of all data, and the boot loader configuration.
ReaR is well suited as a migration tool, because the restoration does not have to take place on the same hardware as the original. ReaR builds the rescue medium with all existing drivers, and the restored system adjusts automatically to the changed hardware.
ReaR even detects changed network cards, as well as different storage scenarios with their respective drivers (migrating IDE to SATA or SATA to CCISS) and modified disk layouts. The ReaR documentation provides a number of mapping files and examples.
An initial full backup of the protected system is the foundation. ReaR works in collaboration with many backup solutions, including Bacula/Bareos SEP SESAM, Tivoli Storage Manager, HP Data Protector, Symantec NetBackup, CommVault Galaxy, and EMC Legato/Networker. See Table 1 for more details about supported backup tools.
Table 1
Backup Tools
| Software | ReaR Option |
|---|---|
| GNU tar on NAS share or tape drive | BACKUP=NETFS, BACKUP_PROG=tar
|
| Rsync on NAS share or local device | BACKUP=NETFS, BACKUP_PROG=rsync
|
| Rsync via network | BACKUP=RSYNC
|
| Rsync Backup Made Easy | BACKUP=RBME
|
| Bacula | BACKUP=BACULA
|
| Bareos | BACKUP=BAREOS
|
| SEP SESAM | BACKUP=SESAM
|
| IBM Tivoli Storage Manager | BACKUP=TSM
|
| HP Data Protector | BACKUP=DP
|
| Symantec NetBackup | BACKUP=NBU
|
| Duplicity/Duply | BACKUP=DUPLICITY (still experimental)
|
| CommVault Galaxy 5, 6 and 7 | BACKUP=GALAXY
|
| EMC Networker (formally Legato) | BACKUP=NSR
|
If no backup solution is available, ReaR will use tar or Rsync (e.g., on an NFS share or USB device). ReaR does not shy from complex configurations with network bonding, software RAID, LVM partition schemes, and exotic filesystems. The restored server boots as if nothing ever happened.
Getting Started with ReaR
The ReaR project provides binary packages for most major Linux major distributions. Fedora, for instance, offers an older Version 1.12 in the Fedora repository as well as a current ReaR Version 1.15 in Fedora updates. CentOS users can find ReaR in the EPEL repo.
SUSE Linux Enterprise includes ReaR packages but only in an older version. (Version 1.14 is also available for openSUSE [3], however, I experienced problems in the installation during the test.) SUSE has even built a YaST module [4] for ReaR. In the first test setup, I used a proven Fedora 19 system (Figure 1).
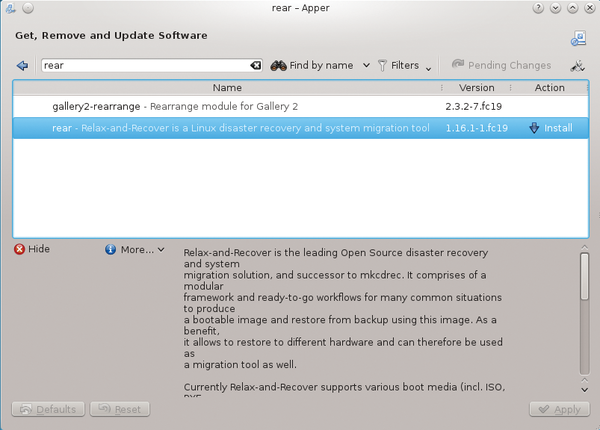 Figure 1: Fedora 19 comes with ReaR Version 1.15.
If the disaster recovery is carried out from a physical medium, a system administrator can prepare the desired backup media, furnish the USB stick with matching ext2/3/4- or Btrfs partition, and make the stick bootable. Format the USB stick using ReaR:
/usr/sbin/rear format /dev/sdX
ReaR merely awaits confirmation that it may entirely overwrite the given medium.
System-specific configuration settings appear in /etc/rear/local.conf. Additionally, the system manager can view the fully commented sample file /usr/share/rear/conf/default.conf. ReaR's homepage provides configuration information, and the ReaR community provides good documentation, as well as a detailed user guide [5].
Easy Setup
ReaR configuration revolves around two main parameters: OUTPUT=, which sets the preferred boot method, and BACKUP=, which defines the backup strategy.
With OUTPUT=USB, for example, the system administrator ensures that ReaR writes to the specified USB device and will configure the boot loader accordingly. Alternatives for other scenarios include: OUTPUT=ISO, OUTPUT=PXE, or OUTPUT=RAMDISK.
With OUTPUT=RAMDISK, ReaR only outputs the kernel and initramfs. The Administrator takes care of further processing. In the default setting, ReaR specifies the finished ISO image in a file under /var/lib/rear/output; you can also specify a location for the output file using the setting OUTPUT_URL=file://.
Depending upon your backup strategy, ReaR generally tries to store the boot image in the backup. You can use the BACKUP_URL parameter to specify the backup target (e.g., an NFS share) and the ISO image also automatically ends up there as well (Figure 2).
 Figure 2: Under usual circumstances, the ISO image ends up in the backup.
The backup strategy is defined by the BACKUP= parameter. ReaR automatically uses Tar with BACKUP=NETFS. The BACKUP_PROG_CRYPT_ENABLED=1 parameter specifies encryption. An alternative to tar (without requiring an external backup program) is BACKUP=RSYNC. BACKUP=EXTERNAL, which defines an external backup tool. BACKUP=REQUESTRESTORE specifies that ReaR prompt the user before starting the backup.
Backup on NFS or CIFS
If the backup process is set to NETFS, BACKUP_URL= provides the desired backup destination:
BACKUP_URL=nfs://NFS-Server/Path ...
ReaR creates a file, which includes the name of the client, under NFS-Server/Path …. You could also specify a tape device or Samba file server:
BACKUP_URL=tape:///dev/nst0, ...
BACKUP_URL=cifs://Samba-Server/Path ...
If ReaR authenticates according to CIFS/Samba, the administrator specifies a corresponding credential file:
BACKUP_OPTIONS=\
  "cred=/etc/rear/.cifs_credentials"
Combining OUTPUT=USB with BACKUP_URL=usb://… lets you write both the backup and the rescue image on the same USB device, which is very useful, because the user gets a bootable recovery media with all the backup files include (provided you have enough space): ReaR completes a full backup by default. Alternatively, you can use one of the EXCLUDE... options to narrow the desired backup scope. For example:
AUTOEXCLUDE_PATH=( /media )
Targeted, mounted directories, such as network shares of external mounted partitions, are excluded from the backup. In contrast,
AUTOEXCLUDE_DISKS=y
includes all disks and partitions from the backup that are not taken from the mounted filesystems. Using:
AUTOEXCLUDE_AUTOFS=..
excludes any automounter paths.
To create and test the rescue image, start ReaR with rear mkrescue. You can just as easily kickstart the backup using rear mkbackuponly. Normally, an administrator will want to create the rescue image and backup in one sitting.
Buy this article as PDF
(incl. VAT)
Buy ADMIN Magazine
US / Canada
UK / Australia
Related content
-
New features in the Bareos Bacula fork
 Available on almost all platforms, the open source backup software Bacula is popular with many administrators – now the Bareos fork is poised to expand its leading role.
 -
Free Enterprise Backup with Bareos

Available on almost all platforms, the open source backup software Bacula is popular with many administrators – now the Bareos fork is poised to expand its leading role.
-
Redo Backup
 Redo Backup backs up complete hard drives locally or over a network. The focus is on simple operation and high reliability in a variety of deployment scenarios.
 -
High-performance backup strategies
 A sound backup strategy with appropriate hardware and software ensures you can backup and restore your data rapidly and reliably.
 -
Cloud protection with Windows Azure Backup
 Microsoft offers the Windows Azure Backup service, which lets you back up data from servers in the cloud. This removes the need for your own infrastructure, and the service alleviates privacy concerns by using continuous encryption.
Subscribe to our ADMIN Newsletters
Subscribe to our Linux Newsletters
Find Linux and Open Source Jobs
Most Popular
Support Our Work
ADMIN content is made possible with support from readers like you. Please consider contributing when you've found an article to be beneficial.
