« Previous 1 2 3 4 Next »
Securing and managing Microsoft IIS
The Right Tools
Managing IIS in Windows Admin Center
Microsoft provides an extension to Windows Admin Center for servers on which IIS is installed. This extension already has almost all of the same functions as the IIS Manager. The advantage of Windows Admin Center for central administration of IIS is that central administration is far easier than with the IIS Manager (Figure 2).
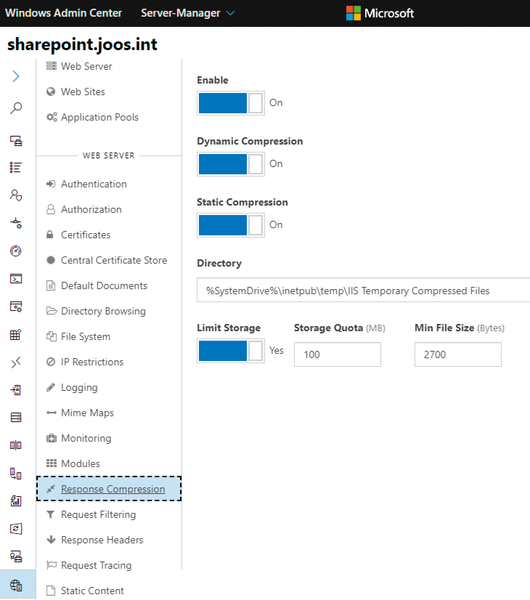 Figure 2: Managing IIS with Windows Admin Center is relatively easy.
To use the extension, add it in the Windows Admin Center settings from Extensions . The Admin Center will then automatically show the appropriate options if IIS is installed on a server. The options are located in the Extensions section of the navigation sidebar from IIS . Microsoft is expected to integrate IIS management permanently into the menu structure of Windows Admin Center. Also in the Admin Center, install the extension for managing IIS over the network on the corresponding server, if necessary. Microsoft also provides the necessary extension on GitHub [1].
After the IIS extension connects to the appropriate server in Windows Admin Center, select the website whose settings you want to change. If the server settings are not displayed, your monitor's resolution is not high enough. In this case, it might be useful to hide the Windows Admin Center menubar with the arrow in the upper left corner. Afterward, Windows Admin Center displays the commands for managing IIS in a separate menu area. The settings are then accessible. The Settings , Bindings , Limits , and Application Pool tabs are used to manage the settings for the site. The Monitoring tab also provides a separate area for monitoring the performance of a web server.
Adjusting the Security Settings
You can use the tools mentioned above to configure the security settings of the web server. In most cases, IIS Manager is still used. Important settings primarily relate to the firewall on the server, for which you can use the standard firewall console (wf.msc; Figure 3) or Windows Admin Center. PowerShell also lets you set rules for the Windows firewall on web servers and comes with the advantage of scripting and automating the configuration work. To create a new firewall rule, for example, use:
New-NetFirewallRule -DisplayName "ICMP block" -Direction Inbound -Protocol icmp4 -Action Block
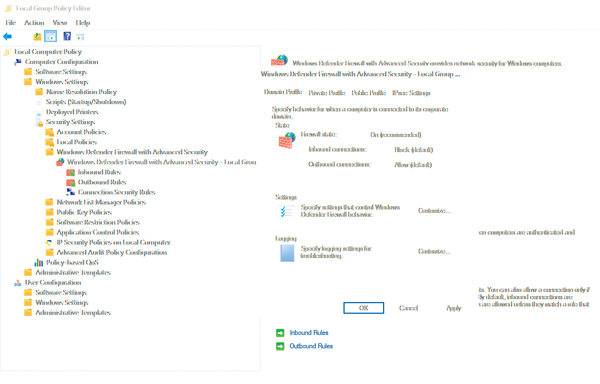 Figure 3: The Windows firewall plays an important role in securing Windows servers. This also applies to IIS.
As you can see, you need to specify the name of the protocol, define the protocol, and control the respective action. Instead of creating a new firewall rule with New-NetFirewallRule, it is often easier to copy existing firewall rules with the Copy-NetFirewallRule command. If you work with IPsec, you can also copy the rules with the Copy-NetIPsecRule cmdlet. Of course, after you copy a rule, you can rename it with Rename-NetFirewallRule, although you can assign a new name as soon as you copy it:
Copy-NetFirewallRule -DisplayName "Require Outbound Authentication" -NewName "Alternate Require Outbound Authentication"
Firewall rules in PowerShell can also be deleted with Remove-NetFirewallRule.
Securing Access
The IP Address and Domain Restrictions feature lets you create access rules to block access to predefined IP ranges and domains. To begin, enable the Edit Feature Settings option. You must install the IP and Domain Restrictions role service.
HTTP redirection means that all access to a specific URL is automatically redirected to another URL. For example, you can redirect your site if you are currently editing parts of it. You could have, say, all requests to www.contoso.com/marketing/default.aspx redirected to the www.contoso.com/sales/default.aspx site. Redirections can be configured at the server or website level by the HTTP Redirection feature. However, you must first install this feature as a role service.
In addition to redirection, you can also define the behavior of the configuration at this point. If you check the Redirect all requests to the exact destination (instead of relative to destination) box, requests are always redirected to exactly the address you specified in the redirection. This also applies when requests are sent to subfolders. If you select the Only redirect requests to content in this directory (not subdirectories) checkbox, the server will redirect requests that are directed to subfolders of the redirected folder directly to the redirection target.
You can set the SSL bindings for web pages in IIS Manager or you can use Windows Admin Center and the IIS extension. Unencrypted access to IIS on SSL pages also can be redirect automatically, for which Microsoft provides the free URL Rewrite [2] extension. In the IIS Manager, first install the extension and then call URL Rewrite . Add Rule lets you create new rules (Figure 4).
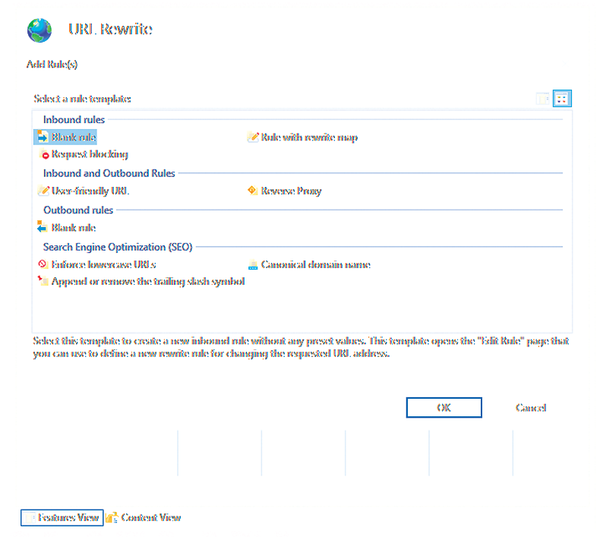 Figure 4: URL Rewrite lets you execute automatic URL redirections.
You can also redirect manually in two ways. For the first method, you can define the corresponding settings in the configuration of the HTTP 403 error message by calling the IIS Manager on the server and clicking on the server name and the website. The Error Pages option is found here, as well. Now double-click on the error pages in the IIS section on the start page and open the 403 error item. Now activate the Respond with a 302 redirect option, enter the HTTPS URL that the users should access, and press OK to confirm.
This type of redirection does not always work. In this case, use the second option for redirection. Start IIS Manager and click on the page for which you want to configure HTTP redirection. Click Bindings and change the binding port from 80 to another free port (e.g., 8001). Now right-click Sites and create a new site with the Add command. As the site name, in the Add Site Binding dialog, assign to the new website the name that users will use to access the server over HTTP (e.g., powerpivot.contoso.int ). Now create a physical path. The folder remains empty; you only need it for IIS, not for the configuration. Leave the binding set to port 80. Because you have already changed the binding of the default page, this port is available. As the hostname, enter the name to which you want the server to respond (e.g., powerpivot.contoso.int ).
After you confirm that you want to create the website, you will then receive a message that port 80 is already in use because port 80 is still assigned to the default website in IIS, even if you changed the port of the site from 80 to another port. However, this page is closed during the install, so it has no significance to the server. Next, click on the newly created page and then double-click HTTP Redirect in the IIS section.
Check the Redirect requests to this destination box and enter the HTTPS address to which you want the server to redirect the requests. Check the Redirect all requests to exact destination box and then press Apply . If users now enter the URL for which you have configured redirection, IIS will detect this access and automatically redirect the request.
« Previous 1 2 3 4 Next »
Buy this article as PDF
(incl. VAT)
Buy ADMIN Magazine
US / Canada
UK / Australia
Related content
-
Monitoring with System Center 2012 R2 Operations Manager
 Put Operations Manager to work monitoring Active Directory, Exchange, and Hyper-V environments.
 -
Managing networks in Windows Server vNext
 We look at a new component in Windows Server vNext – the Network Controller server role.
 -
Server update with Azure Update Management
 Microsoft Azure Update Management automatically patches servers in on-premises data centers, virtual servers on Azure and other cloud services, and even Linux servers.
 -
Software-defined networking with Windows Server 2016
 Windows Server 2016 takes a big step toward software-defined networking, with the Network Controller server role handling the centralized management, monitoring, and configuration of network devices and virtual networks. This service can also be controlled with PowerShell and is particularly interesting for Hyper-V infrastructures.
 -
Windows Server 2012 Tricks
Users of Windows Server 2012 will benefit from numerous innovations, especially in the areas of virtualization, high availability, and storage. In this article, we show you some tricks that make handling the new system much easier.
Subscribe to our ADMIN Newsletters
Subscribe to our Linux Newsletters
Find Linux and Open Source Jobs
Most Popular
Support Our Work
ADMIN content is made possible with support from readers like you. Please consider contributing when you've found an article to be beneficial.
