« Previous 1 2 3 Next »
An introduction to FreeNAS
Open Space
Great Responsibility: A ZFS Primer
A good working knowledge of ZFS is critical to deploying FreeNAS successfully in an enterprise environment. Poorly configured ZFS pools can experience suboptimal performance. Conversely, a well-planned deployment that takes best advantage of ZFS's features can be a definite success.
A ZFS filesystem resides in a pool, which may contain one or more groups of devices called vdevs. The possible types of vdev are individual disks, mirrors, RAID-Z1, RAID-Z2, and RAID-Z3 sets. All of the component groups of a ZFS pool are combined in a manner similar to striping, although the distribution of blocks is not a stripe in the strictest sense of traditional hardware RAID. This means that if even a single group within the pool is damaged beyond its tolerance for recovery, the entire pool is faulted. Mirroring and parity arrangements are only possible within groups, not among them. The upshot is that there is no equivalent of RAID 0+1 or 51 in ZFS – only device arrangements similar to RAID 10, 50, or 60.
By default, ZFS will use any idle RAM in the system as the primary Adaptive Replacement Cache (ARC). A common rule of thumb for ARC is to allow 1GB of RAM for each 1TB of data the system will store. Although solid state drives represent the leading edge of performance in data storage today, they do not yet have the capacity (or cost efficiency) to replace HDDs entirely. ZFS can therefore take best advantage of the higher performance of SSDs as secondary ZFS Intent Log (ZIL) and Level 2 Adaptive Replacement Cache (L2ARC) devices.
Such L2ARC devices can provide more space for caching and significantly improve read latency and throughput, especially random reads. In scenarios where an L2ARC device is used, you'll want to try to match the size of the device to the size of the working set (data that will be read frequently). ZFS supports multiple L2ARC devices, and L2ARC devices may be safely added or removed using the FreeNAS UI. FreeNAS also provides the zilstat command-line utility to help the administrator determine whether the system's workload would benefit from the addition of an L2ARC.
The ZIL records synchronous writes, fulfilling the guarantee that synchronous writes are committed to stable media before returning success. ZFS also allows the creation of a separate intent log (SLOG) on a separate device or set of devices. The SLOG reduces contention for the disk resources of the pool, but if a low-performing device is used for the ZIL, it can become a performance bottleneck. Ideally, you should choose a flash device with low latency and high throughput. Capacity is not critically important for ZIL devices, because the ZIL is flushed to the pool often (usually around every five seconds). Asynchronous writes do not benefit from ZIL devices.
ZFS supports deduplication, or the block-level removal of duplicate data. Deduplication is extremely resource intensive, and a rule of thumb calls for 5GB of RAM per terabyte of storage to be deduplicated. Think very carefully before using dedup on systems intended to back "live" applications, as it is more suitable for backup devices. As an alternative to deduplication, compression can be configured on ZFS pools or datasets.
The default compression method, LZ4, offers nearly real time compression rates. Deduplication and compression share a caveat: Blocks written to a pool where deduplication or compression are enabled will remain that way until the blocks are deleted. Thus, even temporarily enabling deduplication or compression can have long-lasting performance implications, reinforcing the need for proper planning in setting up ZFS and FreeNAS.
All the metadata needed by ZFS is stored in its pool, so a ZFS pool from one system can be exported and then imported by another operating system with a compatible ZFS version. In theory, this means that ZFS pools created on FreeNAS or another system using the same underlying ZFS version can be imported across operating systems and are compatible for the purpose of remote snapshot replication. In practice, you should always test and document such data recovery solutions before making them part of any business continuity or disaster recovery plan.
Encrypted disks are an exception to the rule of portability for ZFS pools. It is recommended that you use another FreeNAS system running the exact same OS (and therefore ZFS) version if the situation calls for mounting an encrypted ZFS pool elsewhere, because encryption methods and key management methodologies can change.
The ZFS Scrubs
feature augments the functionality provided by fsck. A ZFS scrub checks every block on the disk, rather than just filesystem metadata. During a scrub, every block is compared with its checksum, which is stored with its block pointer elsewhere on the disk. If the checksum does not match, ZFS will attempt a repair and indicate the number of mismatches that it found in its scrub report. This feature can provide an early indication of a failing disk. Because it reads all the data from disk, a ZFS scrub is an I/O-intensive operation and is best scheduled for low-load periods. Scrubs should be performed regularly; FreeNAS automatically schedules a scrub for every ZFS volume on every fifth Sunday at midnight. You can use the FreeNAS UI to change the schedule as needed.
Putting It Together
When planning for any enterprise or business-critical deployment scenario, you must choose between various requirements for performance, data protection, capacity, and future growth, all within the constraints of a given budget. Much of the performance of FreeNAS rests on the parameters of the ZFS pool and the amount of RAM in the system. Certain use cases benefit from faster CPU or more CPU cores, and naturally, the network can also become a bottleneck without the right switch and NIC hardware.
For smaller working sets, more RAM or a fast L2ARC may significantly increase the performance of random, read-heavy workloads. Highly sequential workloads or workloads that often read a large portion of the stored data will benefit less from this approach. On the write side, synchronous write applications (i.e., NFS or iSCSI for virtualization purposes) will benefit from low-latency, high-throughput ZIL devices.
Regardless of the specific application, any FreeNAS deployment can benefit from using an optimal RAID-Z. When using RAID-Z, you should use equal-sized disks in groups of some power of two, plus the parity level of the group. Thus, the optimal RAID-Z1 group sizes are 3, 5, and 9 disks, RAID-Z2 are 4, 6, and 10 disks, and RAID-Z3 are 5, 7, 11 disks. When combining multiple RAID-Z groups in a pool, it is best to have an even number of identical groups to avoid a performance penalty and to allow ZFS to keep block arrangements as even as possible. Finally, like many filesystems, ZFS performance is proportional to the amount of free space. ZFS begins experiencing noticeable performance degradation when the pool is around 80 percent full. Take this into account when planning for future growth.
For networking, FreeNAS supports both Gigabit and 10 Gigabit Ethernet. Network configuration can be performed from the console as well as from the web user interface. FreeNAS also supports a number of link aggregation protocols, including LACP, link failover, and round-robin. Link aggregation requires a properly configured switch or router. The ability to saturate a given network connection depends on the rest of the performance considerations discussed above.
Setup and Maintenance
One of the easiest parts of a FreeNAS deployment is the actual installation. By design, the FreeNAS boot disk is separate from the disks in the storage pool. This segregation ensures that operating system upgrades do not threaten storage: In the worst case of a completely failed upgrade, the storage disks will be untouched and may be imported on a fresh FreeNAS instance. The boot disk image is typically written to a USB thumb drive or SSD of at least 2GB in size. Performance of the boot device itself is of almost no concern because FreeNAS runs from memory after boot.
After booting, the FreeNAS console, seen in Figure 4, will display options to configure networking, reset the system, access a root shell, reboot, or shut down. Once the system has received an IP address from a DHCP server, the address will be displayed on this screen and can be used to access the web interface. The rest of the configuration must be performed through the web interface. The FreeNAS documentation [6] contains both a Quick Start Guide and comprehensive instructions for configuring a FreeNAS system.
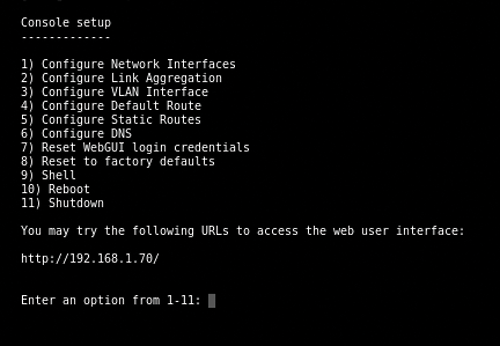 Figure 4: FreeNAS console menu.
As the system is configured, a copy of the configuration can be saved at any point in the configuration to the administrator's system. This lets you easily restore a previously working configuration. Similarly, if the disks are encrypted, make sure to save a copy of the passphrase and keys.
FreeNAS also provides a "GUI Upgrade" option through the web interface. The upgrade process reminds you to download a copy of the configuration database before performing the upgrade. If the upgrade fails, simply reboot and select the previous version of the operating system from the boot menu.
« Previous 1 2 3 Next »
Buy ADMIN Magazine
US / Canada
UK / Australia
Related content
-
Setting up FreeNAS
 FreeNAS offers a range of features to suit your storage needs. We show you how to get started.
 -
Build a Network Attached Storage System with FreeNAS

We provide an overview of FreeNAS and ZFS, its main filesystem, then show you how to set up and maintain a FreeNAS installation.
-
Integrating FreeNAS with Windows Active Directory
 FreeNAS offers a powerful array of features and is adaptable to a wide range of network-attached storage solutions. We look at integrating Windows Active Directory, taking snapshots, replicating, and backing up.
 -
ZFS on Linux helps if the ZFS FUSE service refuses to work
 The new version 10 of FreeBSD can cause Linux admins problems when attempting to reconstruct data from ZFS pools. The solution comes courtesy of the ZFS on Linux project.
 -
Two NexentaOS derivatives compared
 What can tinkerers save on storage, and what do you gain if you opt to spend more and buy a turnkey solution? We compared a do-it-yourself solution with a preconfigured appliance from the same source.
Subscribe to our ADMIN Newsletters
Subscribe to our Linux Newsletters
Find Linux and Open Source Jobs
Most Popular
Support Our Work
ADMIN content is made possible with support from readers like you. Please consider contributing when you've found an article to be beneficial.
