Figure 3
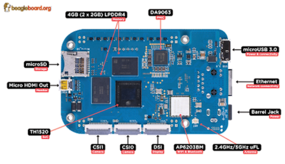
Figure 3: The BeagleV-Ahead port and chip layout. © beagleboard.org
Figure 3: The BeagleV-Ahead port and chip layout. © beagleboard.org