Frontpage
Back
Navigation
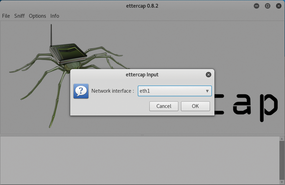
Figure 6
«
Previous
|
Understanding Layer 2 switch port security
|
Next
»
Figure 6: Selecting the attack interface.