Figure 6
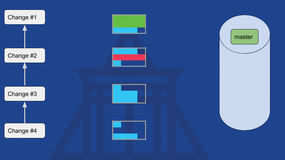
Figure 6: Flow change 1 is going well, but change 1+2 fails in one test!
Figure 6: Flow change 1 is going well, but change 1+2 fails in one test!