Win-Win with Cygwin
Windows administrators: Expand your horizons and your opportunities with Unix commands via Cygwin. Use Cygwin’s extensive list of Unix utilities for scripts, maintenance, compatibility, and automation.
If you work in a larger computing environment, you likely have to deal with Windows systems, Linux systems, and commercial Unix systems, and some of those heterogeneous systems might be under your direct administrative jurisdiction. If you’re using virtualization technology as a Windows administrator, you’re using Linux whether you know it or like it. The exception would be Hyper-V: It’s possible, although not likely, that you work in an all-Windows shop. For the 99% of you who work in a heterogeneous environment, you need to expand your skills to include Linux or Unix. Cygwin is the answer to bridging that gap painlessly.
Cygwin is a powerful set of Linux and Unix (*nix) tools, but its real power comes from being able to turn your heterogeneous environment into a more homogeneous one. Although tools are out there that you can add to *nix systems to make them more compatible with Windows, Cygwin creates a true hybrid Windows/*nix system. For scripted solutions, Cygwin includes a rich set of command-line tools but also has the ability to use graphical ones through its X Window utilities.
In this article, I will guide you through the installation and introduce you to the use of Cygwin, so you can hone your Linux- and Unix-related skills and expand your capability and knowledge in the *nix world. I gave you an overview of Cygwin in last month’s Eat. Pray. Script. column, but this month’s post is a start to finish look at Cygwin and its features.
I can’t teach you Linux commands in a single article, but the scope of this treatment is to give you access to this very powerful toolkit as a starting point for further study.
Preparing for Cygwin
Before you download and install Cygwin, I suggest you check available space on your C: drive (or system drive) because a full installation of Cygwin consumes 1GB or more of space. The default install location is C:, but you can change that during the installation process. If you decide to install to an alternative location, you’ll have to check available space there too.
Additionally, you’ll need a bit of temporary space in which to download the Cygwin files and perform the install. For the installation I chose for this article, my required space was approximately 300MB, and just under 100MB for the temporary staging space.
Keep the temporary staging directory intact for future installations and customizations. The disk cost for these files is minimal compared with the final installation size.
Cygwin Installation
On the system you want to install Cygwin, open a browser and point it to http://www.cygwin.com. Scroll down the page until you see a link for setup.exe, and click that link to launch the installation wizard. The wizard begins with an informational screen (Figure 1).
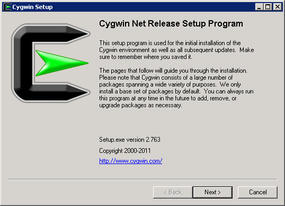
Figure 1: The Cygwin wizard start page.
Note the last sentence on the screen: You can run this program any time in the future to add, remove, or upgrade packages as necessary.
Clicking Next to continue brings up the screen in Figure 2, which gives you three install choices: Install from Internet, Download Without Installing, and Install from Local Directory. If you select Install from Internet (recommended), read the note about the downloaded files being kept for future re-use. This is the staging directory to which I referred in the previous section. Click Next.
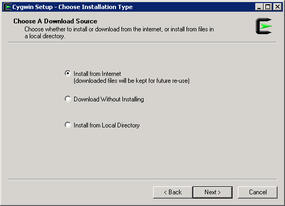
Figure 2: Installation location options.
Next, you select the location on your Windows computer that you want to install Cygwin. The default location is C:\Cygwin. Change the location here, if you want the Cygwin files to use a different drive or folder. Also, you can choose whether to allow all users on the system to use Cygwin or to keep it private.
After clicking Next, choose the disk location to which the compressed Cygwin files download and install. I always use a temporary directory, such as E:\Temp. To continue, click Next. On the next screen, you must select your Internet connection through which you’ll download Cygwin. Possible selections are Direct Connection, Use Internet Explorer Proxy Settings, or Use HTTP/FTP Proxy. If you select HTTP/FTP proxy, you have to fill in the information for your proxy host and port number. (Click Next to continue.)
Now you have to select a download site from the list displayed on the screen. In Figure 3, I chose ftp://mirrors.xmission.com.
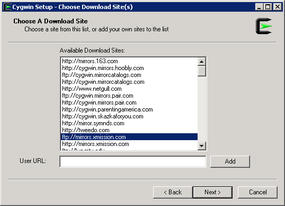
Figure 3: Choosing an available Cygwin download site.
Try to choose one that’s physically close to you or that you know has bandwidth to spare. Also, you can add a URL of your own if you have a private repository that you’d like to use (click Next).
Now it’s time to select the Cygwin packages for installation. As shown in Figure 4, you have a list of categories from which to choose. Each category has a default list of applications ready to install.
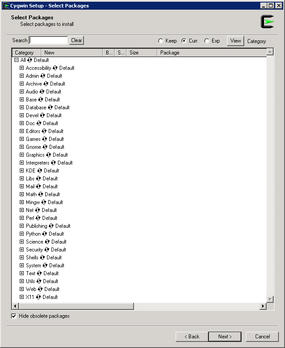
Figure 4: Reviewing Cygwin packages to install.
To to expand the list and see which packages install by default, click the (+) to the left of each category (Figure 5).
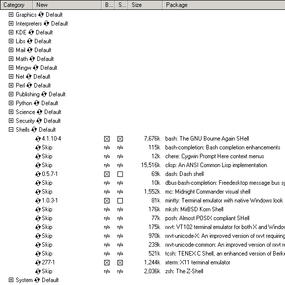
Figure 5: Editing the list of Cygwin applications to be installed.
For example, I’ve expanded the Shells category and selected bash and xterm from the list. To make a package available for installation, click the Skip link so it changes to show a version number and a checkbox. Clicking the checkbox selects the package. These two handy packages are useful in a basic installation. Bash is almost mandatory if you’re going to do any scripting.
Additionally, you should select the xinit package from the X11 category and the openssh package from the Net category for a basic functional installation.
In a later section, I’ll explain how a complete Cygwin installation might work better for certain applications.
Once you’ve selected all of the additional packages you want to install, click Next to continue. Package dependencies will be selected for you by default. The next screen prompts you to verify that you want the dependences. Because you do, click Next to continue.
Your Cygwin installation begins. Depending on which site you selected and how many additional packages you marked for installation, the process could take from 10 minutes to an hour or more. Be patient and allow the process to continue. When complete, the wizard prompts you to Add a Cygwin icon to the Desktop and to the Start Menu, then click Finish. You’ve successfully installed Cygwin to your system and can use it now. No reboot required.
Customization
You might realize that you need to install another package or more sometime after this initial installation. If so, you need to run setup.exe again from where you saved it or directly from the website.
Step through the wizard, accepting the defaults. (The defaults should reflect your earlier selections.) When the wizard displays the list of Cygwin packages, select the category and the package you require. If you don’t know the category under which your package exists, you can search for it with the Search field (upper left corner of the Select Packages window) (Figure 6).
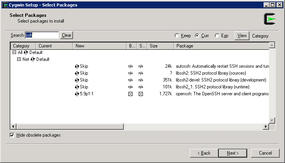
Figure 6: Searching for a specific package (SSH).
Once you’ve selected the package or packages you want, click on through the wizard normally until package installation completes. You can select more than a single package from a category or from multiple categories during a rerun of the setup wizard. If you want to uninstall a package, click the Keep link until it reads Uninstall and proceed through the wizard.
When selecting a package for installation, you might notice the two checkboxes. Selecting the left checkbox installs the binary package (executable and supporting libraries and dependencies) and selecting the right checkbox installs the package source code. You do not need the source code, but you might decide to install it for your own use.
Setting the Path
To add Cygwin to your PATH, open a CMD prompt on your Windows system, type PATH, and press Enter. Your response should look something like this:
C:\Users\Administrator>PATH
PATH=C:\Windows\system32;C:\Windows;C:\Windows\System32\Wbem;C:\Windows\System32
\WindowsPowerShell\v1.0\;C:\Program Files (x86)\Common Files\Citrix\System32\
To use Cygwin effectively, you need to add E:\Cygwin\bin to your PATH environment variable. Of course, use the location of your installation’s bin folder. To do so, right-click Computer | Properties | Advanced System Settings | Environment Variables | System Variables, scroll down until you see Path (Figure 7), and click the Edit button. Enter a semicolon after the last entry and the full path to your Cygwin bin directory (Figure 8).
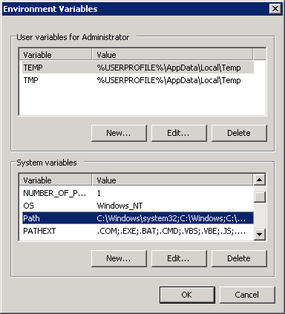
Figure 7: Editing the system variable PATH.
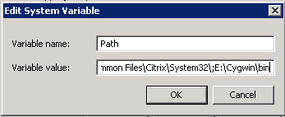
Figure 8: Adding the Cygwin\bin folder to the PATH variable.
Now, when you open a CMD prompt or use the Cygwin Terminal, the Cygwin binaries will be in your PATH. Close and re-open any CMD windows to use the new environment variable.
Command Line
As a Windows administrator, chances are good that you don’t spend much time at the command line. The occasional ipconfig or iisreset notwithstanding, you probably don’t open a command prompt and work there multiple hours a day. If you do, you’re a rare individual, and you’ll have no trouble making the transition to the *nix world. Most *nix administrators exclusively use the command line for their work. In fact, few *nix server systems have a graphical user interface (GUI) desktop installed on them.
The next section, “Using the X GUI,” describes how to interact with graphical applications, should they exist on your *nix systems.
One of the two ways to enjoy Cygwin at the command line is to use the Cygwin Terminal icon located on your Desktop, as shown in Figure 9.
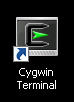
Figure 9: The Cygwin Terminal icon set up during installation.
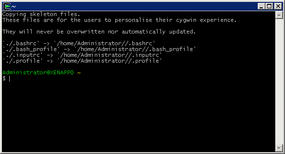
Figure 10: The default Cygwin terminal window and interactive shell.
This icon is a shortcut to a terminal window using the Bash interactive shell. The window shown in Figure 10 is your command-line environment.
From this prompt, you may execute almost every Windows command-line program and every Cygwin command. Try entering a few Windows commands to test my assertion. For example, ipconfig returns your system’s IP information.
Now, enter a few *nix commands, such as ls or pwd to see the results.
At the command prompt, you can create scripts, edit files, connect to remote systems, or navigate your filesystem.
One idiosyncrasy to note when using Cygwin’s Terminal application is that you have to refer to your drives in their *nix equivalents. Your C: drive is now /cygdrive/c and the E: drive is /cygdrive/e. If you attempt to perform an ls on E:, you will receive an error:
$ ls E:
ls: cannot access E:: No such file or directory.
However, if you refer to the *nix version, ls /cygdrive/e, you’ll see a listing of any files in your current folder. It’s likely that you don’t have any files that you can see. To create a few, use the following command:
$ touch file1.txt file2.txt file3.txt
$ ls
file1.txt file2.txt file3.txt
The touch command touches a file to update its timestamp. Touch will also create an empty file, so this is a very useful tool in scripting when you want to test for the existence of a file but not act upon the file. Touch has other uses as well. To learn more about touch (and in the same way, any installed command), type
man touch
at the prompt to view the online documentation.
This is an example of using *nix man (manual) pages. To navigate man pages, use the Enter, Space and q (quit) keys. Man pages are an essential part of any *nix system. Use them freely.
The second way to use Cygwin is to use individual applications in your Windows CMD window. Not all of the commands located in E:\Cygwin\bin will work this way. Some of the applications only work within the interactive Cygwin shell. The easiest way to know which ones work is to check out a program’s extension.
Although extensions have no meaning in *nix, they do in Windows. A file named test.txt is very different from text.exe. If you look in your Cygwin bin folder and list its contents, note the applications with the .exe extension: These commands are available to you in the CMD window, which means you can leverage these new commands in your CMD scripts, pass CMD variables to them, and use them with your knowledge of the familiar Windows CMD syntax.
Using the X GUI
Windows administrators often prefer a graphical environment to the command line. I understand. By installing the xinit package and its dependencies, you’ve installed support for the X Window GUI (X) environment. To use X, you must log in to a remote *nix system via SSH (Secure Shell). SSH is the secure equivalent of the old Telnet application; it provides an interactive shell session on the remote system from which you can work at the command line.
Also, you can direct applications back to your Windows system from the remote *nix computer. I’ll walk you through the steps to test X on your remote system using the classic “Xeyes” program. Xeyes is a fun application that, when running, displays a pair of graphical eyes that follow your mouse around the screen. It’s a silly, useless application, but it’s great for testing X because it’s small and installed on practically every *nix system.
To begin, set up the X window environment on your Windows system. This is known as starting the X server. This process also launches an X terminal window. Type the following command in the Cygwin Terminal window:
$ startxwin
A lot of information scrolls by, and in a few seconds, an Xterm window appears. This Xterm window is your new interactive shell window for use with graphical applications.
Type the following commands as shown. Replace <system> with your *nix system’s name or IP address and replace <username> with your username (login ID) on the remote *nix system.
$ ssh -X-l $ ssh -X 192.168.1.250 -l khess
The first time you perform this action, you’ll receive the following response:
The authenticity of host ‘192.168.1.250’ can’t be established.
RSA key fingerprint is 87:17:c3:92:44:ba:1a:df:d7:9c:44:b2:5b:73:52:09.
Are you sure you want to continue connecting (yes/no)?
This prompt wants to establish a permanent secure key between the two hosts for future reference so that your system recognizes the remote system as legitimate. Type yes at the prompt and press Enter.
After you enter your account password for the remote system, you’re logged in when you see the $ prompt, and you’re now in the remote system’s interactive shell.
The -X switch in the ssh commands in the examples means to forward X output back to your system. In other words, you’re redirecting graphical programs to your Windows system. The -l in the ssh command means you want to use that account ID (username) for the connection. If you don’t use -l, ssh attempts to connect to the remote system using your Windows account ID.
Once logged in to the remote *nix system, type the following command:
$ xeyes &
If you receive the message Error: Can’t open display:, you need to exit your remote *nix session, by typing exit to return to your Windows Xterm and re-enter the ssh command with a capital -X switch.
The Xeyes application should open on your Windows system (Figure 11).
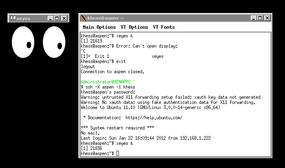
Figure 11: Running the Xeyes Program from a Remote *nix System.
All GUI applications operate in this same way. Be aware that some applications are quite large and might take a few minutes to appear on your Windows computer. Be patient.
Remember that any interactions via the graphical applications take place on the remote *nix system. You’re basically enjoying a remote view of the application from your Windows system.
Creating a Multisystem Install Point
A multisystem install point, as I call it, is a Cygwin installation that you install on a network drive so that multiple Windows systems can map a drive to it and use the applications and utilities from that location. Cygwin does not need to be installed locally to work well because the installation makes no changes to the system folders, nor does it add any files to system folders. All Cygwin files reside under the Cygwin directory tree.
To install to a network drive, create a new share on your network storage or file server and map a drive to that location – I’ll call it drive X:. Direct the Cygwin installation wizard to install Cygwin under the X:\Cygwin folder and use X:\Temp for the installation source folder.
Performing a complete installation is convenient so you have every possible application and executable available for your work. When the wizard displays the categories list, click All (at the top of the Window) until it reads Install. This will change each of the categories to Install as well. A complete installation might take an hour or more to perform.
Once installed in this network location, you can map a drive from any system with access to it. You can add X:\Cygwin\bin permanently to the PATH environment variable by editing the system PATH. You can add temporary access by issuing
PATH=%PATH%;X\Cygwin\bin
at an administrator CMD prompt. Although it’s a bit cumbersome to do so, you can also use a NetBIOS-style path, such as \\system\share\cygwin\bin\ to each command you issue. For example:
\\system\share\cygwin\bin\ls.exe
Any system on which you might use Cygwin regularly should have a permanent (persistent) drive mapping created to the network share and have its PATH variable altered.
Summary
What Cygwin does for you, as a Windows administrator, is provide a consistent set of scripting tools like those you’ll find on *nix systems. It also presents you with a basic level of compatibility between two very different platforms. Cygwin transforms your Windows servers and workstations into advanced hybrid operating systems. Cygwin gives Windows administrators the tools and utilities needed to interact effectively with other data center operating systems.
For more information, read Cygwin’s FAQ and documentation. Also consult *nix man pages for any command-related questions.
Tags:
![]() Cygwin ,
Cygwin , ![]() heterogeneous ,
heterogeneous , ![]() Linux ,
Linux , ![]() system administration ,
system administration , ![]() tools ,
tools , ![]() Unix ,
Unix , ![]() Windows
Windows