An open source object storage solution
Object Lesson
Performance
Once MinIO is installed, you might want to configure it for better performance according to your specific use case. Here are some configuration options to consider:
Erasure Coding. By default, MinIO uses erasure coding for data protection. You can adjust the number of data and parity drives to balance performance and redundancy. To do this, modify the minio server command by specifying the number of data and parity drives:
minio server --data 6 --parity 2 /data
Readjust the erasure code setup according to your desired balance between performance, storage efficiency, and data protection. For example, as far as performance goes, increasing the number of data drives generally improves the read and write performance because the data is distributed across more drives, which can be accessed in parallel. However, adding more parity drives can increase the overhead of encoding and decoding, which could affect performance.
As for storage efficiency, the more parity drives you use, the more storage space is consumed by redundant information, reducing overall storage efficiency because less space is available for data. However, specifying fewer parity drives can increase the risk of data loss or corruption because of less redundancy in the system. A similar balance needs to be achieved for data protection: Increasing the number of parity drives enhances data protection because it allows the system to recover from a higher number of simultaneous drive failures or data corruption. However, adding more parity drives comes at the cost of reduced storage efficiency and potentially lower performance.
For bit rot protection, MinIO uses HighwayHash by default, which provides a good balance between performance and security. However, you can choose a different hash algorithm if you have specific performance or security requirements.
For larger deployments, you should definitely use MinIO in a distributed mode to scale across multiple nodes. In very rough terms, to set up a distributed cluster, specify the drives or directories on each node when starting the MinIO server:
minio server http://node1.example.com/data http://node2.example.com/data ...
At the same time, use a load balancer (e.g., HAProxy or NGINX) to distribute client requests evenly across the MinIO instances. This step can help prevent bottlenecks and ensure high availability.
Setting up a MinIO production system deserves a whole book and cannot be covered in a short article. Fortunately, the documentation on the project website is complete and frequently updated. You will probably want to use Terraform and Ansible to keep your infrastructure and software configuration in code, preferably in a repository.
Selecting the appropriate hardware for your MinIO deployment is crucial for achieving optimal performance. MinIO is designed to work with modern hard and solid-state drives (HDDs and SSDs), so choose drives with high input/output operations per second (IOPS) and low latency for best performance. MinIO can also benefit from multicore processors because it parallelizes operations across multiple cores; therefore, opt for a processor with a high core count and clock speed.
Similarly, MinIO's performance is heavily dependent on network speed. Choose high-bandwidth network interfaces (10Gbps or higher) to minimize network bottleneck issues.
For the filesystem, MinIO recommends XFS or ext4 for optimal performance. Both filesystems are stable, widely used, and have proven performance in large-scale deployments. If you need to maximize performance, you can achieve it by several popular methods, such as disabling access time updates: When mounting the filesystem, add noatime to the mount options:
/dev/sdb1 /mnt/data ext4 defaults,noatime 0 0
You can also increase the read-ahead value to boost the sequential read performance with the blockdev command. For example, to set a read-ahead value of 2048 (1MB) for the /dev/sdb1 device, use:
blockdev --setra 2048 /dev/sdb1
For kernel parameters, you can consider increasing the maximum number of open file descriptors because MinIO can use a large number of these during operation, especially in large-scale deployments. In this case, increase the fs.file-max kernel parameter value to allow for more open file descriptors. You can set this value temporarily with the command:
sysctl -w fs.file-max=1000000
To make this change permanent, add the following line to /etc/sysctl.conf:
fs.file-max = 1000000
In a similar way, you can increase the maximum socket buffer size to enhance network performance with the net.core.rmem_max and net.core.wmem_max kernel parameters. You can set these values temporarily with the commands:
sysctl -w net.core.rmem_max=4194304
sysctl -w net.core.wmem_max=4194304
As before, to make these changes permanent, add the following lines to /etc/sysctl.conf:
net.core.rmem_max = 4194304
net.core.wmem_max = 4194304
Another popular approach is to configure the TCP keepalive settings to improve the stability of long-lived connections by setting some kernel parameters. You can set these values temporarily with the commands:
sysctl -w net.ipv4.tcp_keepalive_time=120
sysctl -w net.ipv4.tcp_keepalive_intvl=30
sysctl -w net.ipv4.tcp_keepalive_probes=3
As before, you can add them to /etc/sysctl.conf to make the changes permanent. When setting these kernel options, don't stick to the numbers provided above but read the documentation and experiment with your own values to find the right balance.
If the tcp_keepalive_time and tcp_keepalive_intvl values are set too high, it might take longer for the system to detect idle or dead connections that could result in increased latency and reduced performance, especially when resources are tied up in maintaining these idle connections. On the other hand, if the tcp_keepalive_time and tcp_keepalive_intvl values are set too low, the system will send keepalive probes too frequently, which can lead to unnecessary resource usage, both in terms of CPU and network bandwidth, as well as potential congestion on the network.
As a side note, you need to be prepared for sporadic problems with faulty hardware. Specifically, when one of the drives in a cluster starts to fail, your safest bet is to remove it. Because MinIO tries to write all the data to the faulty drive, if the operations start to be painfully slow, it can affect the whole storage back end, so removing the faulty drive should help. Fortunately, this is not a very common problem.
The MinIO Client (mc) plays a crucial role in interacting with your MinIO server. To optimize its performance, first use the --concurrent flag to increase the number of concurrent operations when mirroring, copying, or removing objects. This step can help speed up these tasks, especially when dealing with large numbers of small files. Second, enable client-side compression with the --compress flag when uploading objects to save bandwidth and reduce transfer times.
Moreover, MinIO supports caching of frequently accessed objects, which can significantly reduce latency and improve performance for read-heavy workloads. When starting the MinIO server, configure the cache subsystem by specifying the MINIO_CACHE environment variable:
export MINIO_CACHE_DRIVES="/<mnt/cache1>,/<mnt/cache2>"
minio server /data
Replace /<mnt/cache1>,/<mnt/cache2> with the paths to your cache drives.
Finally, the way you organize your objects in MinIO buckets can have a significant affect on performance. To distribute objects evenly across the namespace and help prevent performance issues caused by having too many objects in a single directory, use a hierarchical structure with multiple levels of directories. At the same time, avoid using overly deep directory structures because they can increase latency for object retrieval operations.
Buckets and Objects
To create a new bucket, use the mb subcommand followed by the alias and bucket name:
mc mb mycluster1/new-bucket
To list all the buckets in your MinIO server, use the ls subcommand:
mc ls mycluster1
In the same way, to upload a file to a bucket and download a file from a bucket, use the cp subcommand,
mc cp local-file.txt mycluster1/new-bucket
mc cp mycluster1/new-bucket/local-file.txtlocal-file.txt
just reversing the order of its arguments. Removing an object or bucket is equally simple:
mc rm mycluster1/new-bucket/local-file.txt
mc rb mycluster1/new-bucket
The same actions can be performed in the browser (Figure 2), although the mc utility is probably more convenient and less prone to error, especially for larger collections of data.
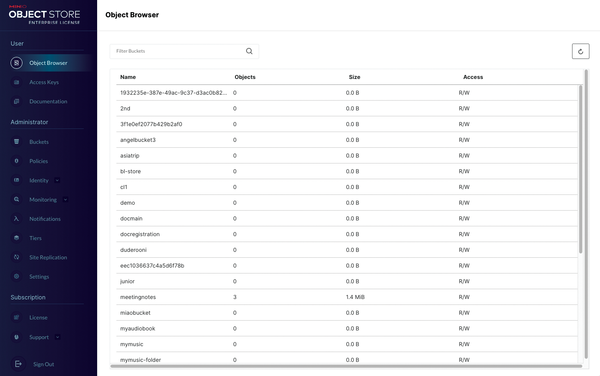 Figure 2: The MinIO browser.
Bucket Policies
Granular access control is essential for managing user access to your data. MinIO supports bucket policies and user policies, which allow you to control access to specific resources on the basis of users, groups, and actions. AWS users will find MinIO bucket policies familiar (Listing 2).
Listing 2
Sample Bucket Policy
{
  "Version": "2012-10-17",
  "Statement": [
    {
      "Effect": "Allow",
      "Action": [
        "s3:GetObject"
      ],
      "Resource": [
        "arn:aws:s3:::my-minio-bucket/*"
      ]
    }
  ]
}
To use the policy from Listing 2, you need to save it first (e.g., as read-only-policy.json) and then register it (e.g., as read-only-policy):
mc admin policy add mycluster1 read-only-policy read-only-policy.json
At this point you can assign it with
mc admin policy set mycluster1 read-only-policy user=new-user
just like the built-in policy used earlier.
Buy this article as PDF
(incl. VAT)
Buy ADMIN Magazine
US / Canada
UK / Australia
Related content
-
MinIO: Amazon S3 competition
 MinIO promises no less than a local object store with a world-class S3 interface and features that even the original lacks.
 - Versity Open Sources New S3 Gateway
-
Persistent storage management for Kubernetes
 The container storage interface (CSI) allows CSI-compliant plugins to connect their systems to Kubernetes and other orchestrated container environments for persistent data storage.
 -
Cloud-native storage for Kubernetes with Rook
 Kubernetes is known to be inflexible when it comes to persistent storage, but Rook now offers cloud-native storage and seeks to achieve harmony.
Subscribe to our ADMIN Newsletters
Subscribe to our Linux Newsletters
Find Linux and Open Source Jobs
Most Popular
Support Our Work
ADMIN content is made possible with support from readers like you. Please consider contributing when you've found an article to be beneficial.
