Win-Win with Cygwin
If you work in a larger computing environment, you likely have to deal with Windows systems, Linux systems, and commercial Unix systems, and some of those heterogeneous systems might be under your direct administrative jurisdiction. If you’re using virtualization technology as a Windows administrator, you’re using Linux whether you know it or like it. The exception would be Hyper-V: It’s possible, although not likely, that you work in an all-Windows shop. For the 99% of you who work in a heterogeneous environment, you need to expand your skills to include Linux or Unix. Cygwin is the answer to bridging that gap painlessly.
Cygwin is a powerful set of Linux and Unix (*nix) tools, but its real power comes from being able to turn your heterogeneous environment into a more homogeneous one. Although tools are out there that you can add to *nix systems to make them more compatible with Windows, Cygwin creates a true hybrid Windows/*nix system. For scripted solutions, Cygwin includes a rich set of command-line tools but also has the ability to use graphical ones through its X Window utilities.
In this article, I will guide you through the installation and introduce you to the use of Cygwin, so you can hone your Linux- and Unix-related skills and expand your capability and knowledge in the *nix world. I gave you an overview of Cygwin in last month’s Eat. Pray. Script. column, but this month’s post is a start to finish look at Cygwin and its features.
I can’t teach you Linux commands in a single article, but the scope of this treatment is to give you access to this very powerful toolkit as a starting point for further study.
Preparing for Cygwin
Before you download and install Cygwin, I suggest you check available space on your C: drive (or system drive) because a full installation of Cygwin consumes 1GB or more of space. The default install location is C: , but you can change that during the installation process. If you decide to install to an alternative location, you’ll have to check available space there too.
Additionally, you’ll need a bit of temporary space in which to download the Cygwin files and perform the install. For the installation I chose for this article, my required space was approximately 300MB, and just under 100MB for the temporary staging space.
Keep the temporary staging directory intact for future installations and customizations. The disk cost for these files is minimal compared with the final installation size.
Cygwin Installation
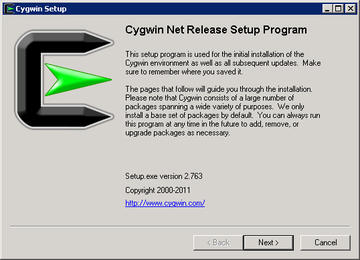
On the system you want to install Cygwin, open a browser and point it to http://www.cygwin.com . Scroll down the page until you see a link for setup.exe, and click that link to launch the installation wizard. The wizard begins with an informational screen (Figure 1).
Note the last sentence on the screen: You can run this program any time in the future to add, remove, or upgrade packages as necessary.
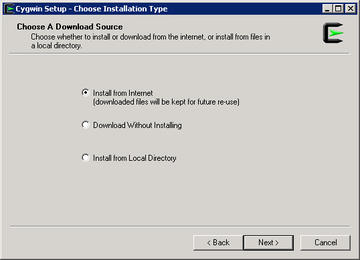
Clicking Next to continue brings up the screen in Figure 2, which gives you three install choices: Install from Internet , Download Without Installing , and Install from Local Directory . If you select Install from Internet (recommended), read the note about the downloaded files being kept for future re-use. This is the staging directory to which I referred in the previous section. Click Next .
Next, you select the location on your Windows computer that you want to install Cygwin. The default location is C:\Cygwin . Change the location here, if you want the Cygwin files to use a different drive or folder. Also, you can choose whether to allow all users on the system to use Cygwin or to keep it private.
After clicking Next , choose the disk location to which the compressed Cygwin files download and install. I always use a temporary directory, such as E:\Temp . To continue, click Next . On the next screen, you must select your Internet connection through which you’ll download Cygwin. Possible selections are Direct Connection , Use Internet Explorer Proxy Settings , or Use HTTP/FTP Proxy . If you select HTTP/FTP proxy, you have to fill in the information for your proxy host and port number. (Click Next to continue.)
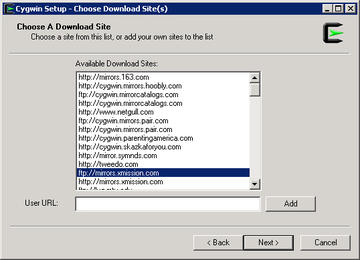
Now you have to select a download site from the list displayed on the screen. In Figure 3, I chose ftp://mirrors.xmission.com .
Try to choose one that’s physically close to you or that you know has bandwidth to spare. Also, you can add a URL of your own if you have a private repository that you’d like to use (click Next ).
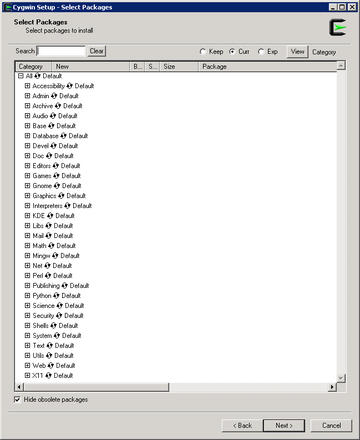
Now it’s time to select the Cygwin packages for installation. As shown in Figure 4, you have a list of categories from which to choose. Each category has a default list of applications ready to install.
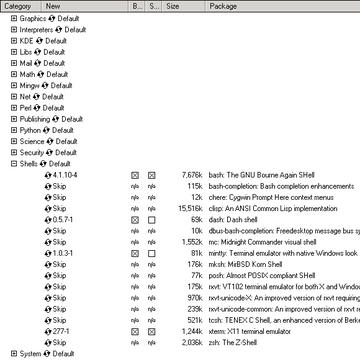
To to expand the list and see which packages install by default, click the (+) to the left of each category (Figure 5).
For example, I’ve expanded the Shells category and selected bash and xterm from the list. To make a package available for installation, click the Skip link so it changes to show a version number and a checkbox. Clicking the checkbox selects the package. These two handy packages are useful in a basic installation. Bash is almost mandatory if you’re going to do any scripting.
Additionally, you should select the xinit package from the X11 category and the openssh package from the Net category for a basic functional installation.
In a later section, I’ll explain how a complete Cygwin installation might work better for certain applications.
Once you’ve selected all of the additional packages you want to install, click Next to continue. Package dependencies will be selected for you by default. The next screen prompts you to verify that you want the dependences. Because you do, click Next to continue.
Your Cygwin installation begins. Depending on which site you selected and how many additional packages you marked for installation, the process could take from 10 minutes to an hour or more. Be patient and allow the process to continue. When complete, the wizard prompts you to Add a Cygwin icon to the Desktop and to the Start Menu , then click Finish . You’ve successfully installed Cygwin to your system and can use it now. No reboot required.
Subscribe to our ADMIN Newsletters
Subscribe to our Linux Newsletters
Find Linux and Open Source Jobs
Most Popular
Support Our Work
ADMIN content is made possible with support from readers like you. Please consider contributing when you've found an article to be beneficial.


