© Graphic Designer, Fotolia.com

© Graphic Designer, Fotolia.com

The 12 best tricks for Windows Server 2012

Treasure Trove

Article from ADMIN 13/2013
By
Users of Windows Server 2012 will benefit from numerous innovations, especially in the areas of virtualization, high availability, and storage. In this article, we show you some tricks that make handling the new system much easier.

While users are still debating about the usability of Windows 8, administrators are worrying about the use of Windows Server 2012, which is available either tiled or totally without a GUI on request. Underneath its new clothes, the new Windows Server variant has treasures to offer, as shown by the following tricks.

Trick 1

Efficient Use of Server Manager

Windows Server 2008 R2 in part already allowed administrators to manage the network with Server Manager. However, that was all fairly rudimentary. For example, Server Manager in Windows Server 2008 R2 could not install roles over the network, and the management of server roles was not very efficient. Windows Server 2012 is vastly improved. For example, in Windows Server 2012, you can install server roles and features over the network on other servers (Figure 1).

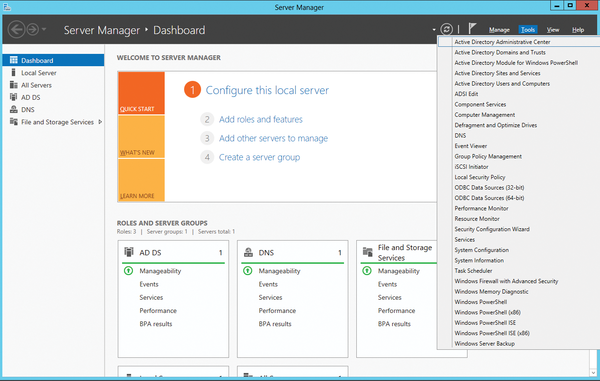
Figure 1: Server Manager in Windows Server 2012 provides centralized management of roles and features.

Microsoft has combined the wizards for installing server roles and features into a single wizard. This approach makes the process easier and faster because only a single install is necessary. Server Manager automatically groups installed server roles together with the appropriate servers. Server Manager lists management tools directly in the Tools menu, and you can even edit the Tools menu. To do this, open the Control Panel and look for System and Security | Administrative Tools . Server Manager shows all of the links in this area in the Tools menu. At this point, you can add more links, remove links, and even create a folder structure.

To use Server Manager in Windows Server 2012 to connect to more servers, just click on Manage and then Add Servers . In the window, you can then search for servers, so you can manage them in your local Server Manager. In this way, you also create your own groups of servers, which you can combine in Server Manager. You can then view event messages for these groups. Note that you can only install server roles and features if you have previously connected to the appropriate server.

Trick 2

NIC Teaming

Windows Server 2012 can combine up to 32 compatible network cards in teams without additional tools. During setup, you can select whether you want to use the individual adapters in the team as standby adapters to improve availability, or whether you want to combine the speed of the adapters to increase performance. You can only combine Ethernet connections in teams. Bluetooth and WLAN are not supported. Additionally, all network cards must be connected with the same speed.

To create a NIC team, launch Server Manager and click Local Server . By default, NIC Teaming is disabled. To enable the feature, click on the Disabled link. A new window will appear. Here, in the lower right area you can see which network adapters in the server are compatible with NIC teaming. To create a team, just right-click in the Adapters and Interfaces window and select Add to New Team .

The Properties link lets you define additional settings for your NIC team. Windows Server 2012 uses the MAC address of the primary NIC as the MAC address of the team. Core servers also support NIC teams. You can handle the setup either with Server Manager on another server, or you can use PowerShell. In PowerShell, you can use Get-NetAdapter to view the individual team adapter candidates and use Enable-NetAdapter or Disable-NetAdapter to enable or disable individual adapters.

All commandlets for managing NIC teams can be listed using Get-Command -Module NetLbfo. To create a new team, use the New-NetLbfoTeam <team name> <Network Interface Cards> commandlet. A list of comma-separated NICs is required here. Windows Server 2012 removes the IP binding from the physical network interface cards and binds them to the new virtual adapter which the wizard created for the team. You can view the status of the team in the Server Manager Local Server section by clicking on the Enabled link by NIC Teaming (Figure 2).

Figure 2: Viewing the NIC Teaming status.

If the team and the associated adapters are shown as active, you can adjust the network settings for the team. To do this, open the adapter settings by entering ncpa.cpl on the welcome page. You can then see the new team. On Hyper-V hosts you can create multiple virtual switches on the basis of the various physical adapters and then create NIC teams within virtual servers. They use the individual virtual switches of the Hyper-V host as their basis.

Trick 3

Virtual Domain Controller -- Cloning and Snapshots

In Windows Server 2012, Microsoft has optimized the use of virtual domain controllers.

In contrast to previous versions, snapshots and cloned domain controllers no longer pose a risk to the entire Active Directory. To virtualize and also clone your domain controllers optimally, at least the following conditions must be met:

  • The PDC emulator must be on a domain controller with Windows Server 2012. You cannot clone the PDC emulator; it must always be available during the cloning process.
  • The domain must already have at least two domain controllers with Windows Server 2012 because you can only clone the second. The first one provides the PDC emulator.
  • The virtualization solution must support this new technology (VM generation ID). Currently, this is only Hyper-V in Windows Server 2012.

To discover whether the virtualization solution you use supports the new VM generation ID, check out the Device Manager on a virtualized server with Windows Server 2012. The driver for system devices must be the Microsoft Hyper-V Generation Counter with the vmgencounter.sys driver file.

Before you clone a virtual domain controller, you need to run the

Get-ADDCCloningExcludedApplicationList

commandlet on the server. This cmdlet checks whether there are applications on the virtual server that do not support cloning.

If the cmdlet discovers incompatible services, for example, the DHCP service or an antivirus scanner, a message appears telling you this.

The configuration for cloning is created in the DCCloneConfig.xml file. The sample file, SampleDCCloneConfig.xml, is located in C:\Windows\System32.

After creating the DCCloneConfig.xml file, you can copy this to the folder with the Active Directory database, which is normally the C:\Windows\NTDS folder. You can only clone source domain controllers that are members of the Clonable domain controllers group in Active Directory. You also can only clone domain controllers that are not switched on. That is, you must shut down the appropriate domain controller before you can clone it.

Before adding the new domain controller to Active Directory, you must copy the DCCloneConfig.xml file customized by the cloning process from the source computer to the folder with the Active Directory database  – that is, normally from the source computer to C:\Windows\NTDS on the target computer. Windows modifies the name of the file to show that a cloning process has taken place. Change the name back to DCCloneConfig.xml.

Next, you can either create a new virtual machine and use the copied hard drive, or you can import the exported server with the Hyper-V Manager or PowerShell. When you import, select the option Copy the virtual machine . When you start the domain controller, it parses the DCCloneConfig.xml file and prepares itself for the cloning. You will also receive a corresponding message when Windows starts up (Figure 3).

Figure 3: Windows Server 2012 cloning Active Directory on the new virtual domain controller.

Buy ADMIN Magazine

SINGLE ISSUES
 
SUBSCRIPTIONS
 
TABLET & SMARTPHONE APPS
Get it on Google Play

US / Canada

Get it on Google Play

UK / Australia

Related content

  • Windows Server 2012 Tricks

    Users of Windows Server 2012 will benefit from numerous innovations, especially in the areas of virtualization, high availability, and storage. In this article, we show you some tricks that make handling the new system much easier.

  • Hyper-V with the SMB 3 protocol
    Microsoft has introduced several improvements to Windows Server 2012 and Windows Server 2012 R2 with its Server Message Block 3. Hyper-V mainly benefits from faster and more stable access to network storage. In this article, we look at the innovations.
  • System Center 2012 SP1: What's new?
    Service Pack 1 expands System Center 2012 primarily in terms of features for virtualization and cloud computing. We provide the details in this article.
  • Hyper-V 3.0 in Windows Server 2012

    In the old Hyper-V hypervisor from Microsoft, many features for professional use were missing. The new version 3.0 has been significantly improved and is slowly catching up to VMware.

  • Virtual networks with Hyper-V in Windows Server 2016
    Microsoft provides some interesting virtualization features in current and future versions of Windows Server. You can connect or isolate virtual machines, and Windows Server 2016 even supports virtual switches.
comments powered by Disqus
Subscribe to our ADMIN Newsletters
Subscribe to our Linux Newsletters
Find Linux and Open Source Jobs


Support Our Work

ADMIN content is made possible with support from readers like you. Please consider contributing when you've found an article to be beneficial.

Learn More”>
	</a>

<hr>		    
			</div>
		    		</div>

		<div class=