« Previous 1 2 3 4 Next »
Win-Win with Cygwin
Command Line
As a Windows administrator, chances are good that you don’t spend much time at the command line. The occasional ipconfig or iisreset notwithstanding, you probably don’t open a command prompt and work there multiple hours a day. If you do, you’re a rare individual, and you’ll have no trouble making the transition to the *nix world. Most *nix administrators exclusively use the command line for their work. In fact, few *nix server systems have a graphical user interface (GUI) desktop installed on them.
The next section, “Using the X GUI,” describes how to interact with graphical applications, should they exist on your *nix systems.
One of the two ways to enjoy Cygwin at the command line is to use the Cygwin Terminal icon located on your Desktop, as shown in Figure 9.
 Figure 9: The Cygwin Terminal icon set up during installation.
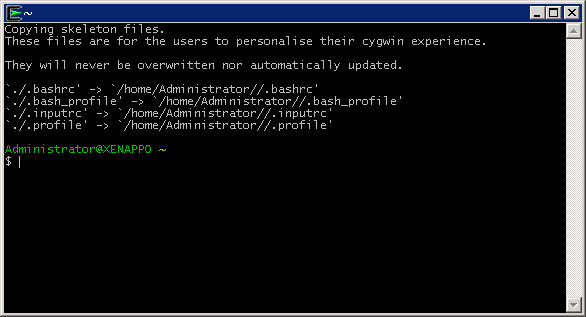 Figure 10: The default Cygwin terminal window and interactive shell.
This icon is a shortcut to a terminal window using the Bash interactive shell. The window shown in Figure 10 is your command-line environment.
From this prompt, you may execute almost every Windows command-line program and every Cygwin command. Try entering a few Windows commands to test my assertion. For example, ipconfig returns your system’s IP information.
Now, enter a few *nix commands, such as ls or pwd to see the results.
At the command prompt, you can create scripts, edit files, connect to remote systems, or navigate your filesystem.
One idiosyncrasy to note when using Cygwin’s Terminal application is that you have to refer to your drives in their *nix equivalents. Your C: drive is now /cygdrive/c and the E: drive is /cygdrive/e . If you attempt to perform an ls on E: , you will receive an error:
$ ls E:
ls: cannot access E:: No such file or directory.
However, if you refer to the *nix version, ls /cygdrive/e , you’ll see a listing of any files in your current folder. It’s likely that you don’t have any files that you can see. To create a few, use the following command:
$ touch file1.txt file2.txt file3.txt
$ ls
file1.txt file2.txt file3.txt
The touch command touches a file to update its timestamp. Touch will also create an empty file, so this is a very useful tool in scripting when you want to test for the existence of a file but not act upon the file. Touch has other uses as well. To learn more about touch (and in the same way, any installed command), type
man touch
at the prompt to view the online documentation.
This is an example of using *nix man (manual) pages. To navigate man pages, use the Enter, Space and q (quit) keys. Man pages are an essential part of any *nix system. Use them freely.
The second way to use Cygwin is to use individual applications in your Windows CMD window. Not all of the commands located in E:\Cygwin\bin will work this way. Some of the applications only work within the interactive Cygwin shell. The easiest way to know which ones work is to check out a program’s extension.
Although extensions have no meaning in *nix, they do in Windows. A file named test.txt is very different from text.exe . If you look in your Cygwin bin folder and list its contents, note the applications with the .exe extension: These commands are available to you in the CMD window, which means you can leverage these new commands in your CMD scripts, pass CMD variables to them, and use them with your knowledge of the familiar Windows CMD syntax.
Using the X GUI
Windows administrators often prefer a graphical environment to the command line. I understand. By installing the xinit package and its dependencies, you’ve installed support for the X Window GUI (X) environment. To use X, you must log in to a remote *nix system via SSH (Secure Shell). SSH is the secure equivalent of the old Telnet application; it provides an interactive shell session on the remote system from which you can work at the command line.
Also, you can direct applications back to your Windows system from the remote *nix computer. I’ll walk you through the steps to test X on your remote system using the classic “Xeyes” program. Xeyes is a fun application that, when running, displays a pair of graphical eyes that follow your mouse around the screen. It’s a silly, useless application, but it’s great for testing X because it’s small and installed on practically every *nix system.
To begin, set up the X window environment on your Windows system. This is known as starting the X server. This process also launches an X terminal window. Type the following command in the Cygwin Terminal window:
$ startxwin
A lot of information scrolls by, and in a few seconds, an Xterm window appears. This Xterm window is your new interactive shell window for use with graphical applications.
Type the following commands as shown. Replace <system > with your *nix system’s name or IP address and replace <username > with your username (login ID) on the remote *nix system.
$ ssh -X <system> -l <username>
$ ssh -X 192.168.1.250 -l khess
The first time you perform this action, you’ll receive the following response:
The authenticity of host ‘192.168.1.250’ can’t be established.
RSA key fingerprint is 87:17:c3:92:44:ba:1a:df:d7:9c:44:b2:5b:73:52:09.
Are you sure you want to continue connecting (yes/no)?
This prompt wants to establish a permanent secure key between the two hosts for future reference so that your system recognizes the remote system as legitimate. Type yes at the prompt and press Enter.
After you enter your account password for the remote system, you’re logged in when you see the $ prompt, and you’re now in the remote system’s interactive shell.
The -X switch in the ssh commands in the examples means to forward X output back to your system. In other words, you’re redirecting graphical programs to your Windows system. The -l in the ssh command means you want to use that account ID (username) for the connection. If you don’t use -l , ssh attempts to connect to the remote system using your Windows account ID.
Once logged in to the remote *nix system, type the following command:
$ xeyes &
If you receive the message Error: Can’t open display: , you need to exit your remote *nix session, by typing exit to return to your Windows Xterm and re-enter the ssh command with a capital -X switch.
The Xeyes application should open on your Windows system (Figure 11).
 Figure 11: Running the Xeyes Program from a Remote *nix System.
All GUI applications operate in this same way. Be aware that some applications are quite large and might take a few minutes to appear on your Windows computer. Be patient.
Remember that any interactions via the graphical applications take place on the remote *nix system. You’re basically enjoying a remote view of the application from your Windows system.
« Previous 1 2 3 4 Next »
Related content
-
Win-win with Cygwin
 Windows administrators: Expand your horizons and opportunities with Unix commands via Cygwin. We show how to use Cygwin's extensive list of Unix utilities for scripts, maintenance, compatibility, and automation.
 -
GNU tools under Windows
 Many admins are responsible for heterogeneous IT environments. Those who want use the popular Bash and GNU tools under Windows can either install the Cygwin compatibility layer or try Gow, the more slender alternative.
 -
SSH Administration – Windows in a Unix World
 If you're a Windows user, you need four essential tools to work in a heterogeneous environment: PuTTY, WinSCP, Xming, and Cygwin.
 -
Hands-on test of Windows Subsystem for Linux
 If you don't want to do without the main advantages of Linux on the Windows platform, the Windows Subsystem for Linux offers another option. We delve the depths of the Linux underworld and explain how you can optimize the subsystem.
 -
MobaXterm: Unix for Windows
MobaXterm, a portable X server for Windows, bundles built-in Unix/Posix tools into a single portable EXE file, letting you use a Linux command line and tools on the Windows desktop.
Subscribe to our ADMIN Newsletters
Subscribe to our Linux Newsletters
Find Linux and Open Source Jobs
Most Popular
Focus On Self-Hosting
• Self-Hosted Collaboration with Forgejo
• Self-Hosted PaaS with Coolify
• Build and Host Docker Images
• Self-Hosted Pritunl VPN Server with MFA
• Self-Hosted Chat Servers
Support Our Work
ADMIN content is made possible with support from readers like you. Please consider contributing when you've found an article to be beneficial.
