« Previous 1 2 3 4 Next »
Delegate and restrict authorizations in Azure AD
Temporary Admin
Privileged Identity Management
In the context of administrative entities, Privileged Identity Management (PIM) is an essential component for delegating user authorizations. PIM protects resources and user accounts in Azure AD – and by extension in Microsoft 365 and Endpoint Manager. The technology can help prevent attacks on privileged user accounts.
Managing user accounts in Azure AD is important, of course, especially in the context of protecting privileged accounts. In particular, these are the accounts that have more rights in the environment than normal user accounts and that are members of an administrative unit through management roles: admin accounts or accounts belonging to support staff and users with far-reaching permissions.
Protecting user accounts with elevated authorizations is an important factor for higher security in the cloud, and it boosts the security of the various resources in Microsoft 365 and other cloud services. Every environment has users who have access to a particularly large number of resources or complete applications. The question is whether the respective user accounts need these rights permanently or only for certain tasks and at specific times. In most cases, comprehensive authorizations are rarely necessary. It makes sense to restrict these authorizations for user accounts at times when they are not needed so that even if an admin account is hijacked successfully by an attacker, the resources are protected because the account cannot exercise its privileges.
Protecting admin accounts is the job of Azure AD Privileged Identity Management (Figure 6). This service protects accounts in Azure, Microsoft 365, and environments such as Microsoft Endpoint Manager. If attackers hijack accounts in infrastructures with these services, they can usually carry out far-reaching, damaging actions – even as far as penetrating into the local data center. To use Azure AD PIM, organizations need a license for Azure AD Premium P2. Microsoft spells out the license requirements exactly online [1].
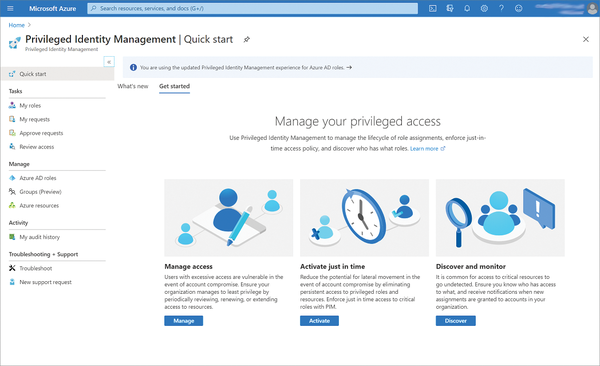 Figure 6: Azure AD PIM works with the management entities for assigning user rights.
Managing Azure AD PIM
Azure AD PIM is managed on the Azure portal. Searching for Azure AD Privileged Identity Management in the portal opens the management interface for the service, which can be used to control access, in parallel with administrative units, in the various environments already mentioned.
On the service management page, Azure AD roles shows the different roles and the options for protecting these roles. Clicking on Roles takes you to the individual roles that are allowed to perform administrative tasks in the environment. These are also the roles you assign in the administrative unit. PIM in turn protects user memberships of these roles and therefore user authorizations. By way of an example, the Exchange Administrator role can manage almost all settings in Exchange Online.
After clicking on the role, the Azure portal displays the various management options. To add user accounts to a role in Azure AD and therefore also in Microsoft 365 and Endpoint Manager, all you need to do is click Roles | Add assignments . You can then choose the desired role under Select role and then select a user account to which you want to assign the role; the users will be able to manage Exchange Online or other resources in the future but are protected by PIM.
Controlling Access Times and Scenarios
Once you have selected the role and added the members, the next step is to set the access type for the role. In addition to permission for administrative access, at this point it is also possible to control the times at which user accounts will be granted administrative authorizations. However, you first need to establish the membership by clicking Assign . New members can be added and removed at any time in the role settings. When added, members are notified automatically by email of the details of the role.
When you call up the role, you can see its members and configure the details in Settings . In the upper area of the details, press Edit to start making changes. At this point you can, for example, define the user account that will authorize administrative access for the users of the role. In the role management settings, you can configure how long access will be allowed once the approver has allowed access (Figure 7). You can also stipulate multifactor authentication for accessing the role's authorizations. However, this is something you would generally want to do for all user accounts in Azure AD and Microsoft 365 anyway.
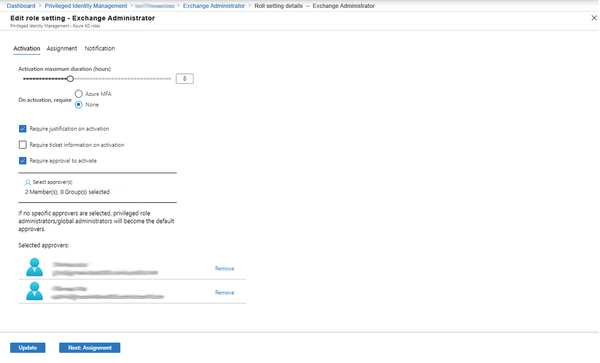 Figure 7: PIM lets you control membership in Azure AD management roles.
The buttons in the lower area can then be used to configure further settings, such as whether a user is given permanent authorization or when authorizations expire. You can also choose to have email sent when a user requests and receives a role.
« Previous 1 2 3 4 Next »
Buy this article as PDF
(incl. VAT)
Buy ADMIN Magazine
US / Canada
UK / Australia
Related content
-
Private cloud with Microsoft Azure Stack
 Azure Stack is an Azure extension that implements an on-premises data center for consistent hybrid cloud deployments.
 -
The Azure Arc multicloud and on-premises management platform
 The Azure Arc cloud service supports centralized management of Windows and Linux servers, Kubernetes clusters, and SQL servers that are not themselves running in Azure, extending Azure management capabilities to servers in traditional data centers or any other cloud environment. We show you how to get Azure Arc up and running and look at its key features.
 -
Privileged Identity Management in Azure AD
 Azure Active Directory privileged identity management provides just enough administration for admins to carry out their work, while minimizing the possibility of security breaches through privileged admin accounts.
 -
Automating the Azure infrastructure using a command-line interface
 When it comes to merging the cloud with local resources, Azure offers some useful automation tools.
 -
Server update with Azure Update Management
 Microsoft Azure Update Management automatically patches servers in on-premises data centers, virtual servers on Azure and other cloud services, and even Linux servers.
Subscribe to our ADMIN Newsletters
Subscribe to our Linux Newsletters
Find Linux and Open Source Jobs
Most Popular
Support Our Work
ADMIN content is made possible with support from readers like you. Please consider contributing when you've found an article to be beneficial.
