« Previous 1 2 3 Next »
Server virtualization with VirtualBox
To Each Its Own
A Walk Through VirtualBox
Because the Linux server doesn't have a graphical user interface, controls are restricted to the command line. The focus here is the vboxmanage command; if you call it with the -h parameter set, you are treated to no fewer than 448 lines of commands and parameters. You just need a few of them to start creating, cloning, deleting, and modifying virtual machines. For more information, check out Chapter 8 of the VirtualBox online help [4].
Anyone who finds this process cumbersome can simply use a same-version VirtualBox installed on the desktop (independent of operating system) and point and click to create the VMs for the server. Of course, the configuration for, say, the network has to be adjusted to match the host later on, but you can then easily export the VM and its virtual hard disk in the main menu (File | Export Appliance
) to create an .ova file. If you use the .ovf extension, the configuration file and virtual disk will be exported to their own files. Once the VM has been copied to the server, it can be imported again with the command:
vboxmanage import my-vm.ova
To start the virtual machine on the server, type:
vboxmanage startvm UUID/Name
If you are not quite sure of the name or the UUID for the VM, you can retrieve this information with the
vboxmanage list vms
command.
VirtualBox GUI on the Network
You will not always want to manage VirtualBox on the server via the command line. Alternatively, you can use the graphical front end phpVirtualBox [5] by Ian Moore, which offers browser-based controls. phpVirtualBox maps the VirtualBox GUI in detail with the help of Ajax in the browser (Figure 2). This means virtually no restrictions compared with operations as usual on the native GUI. However, phpVirtualBox is not designed for setting up a hosted service in which multiple users have different permissions for the different VMs: The administrator on phpVirtualBox always has full control of all the VMs on the host.
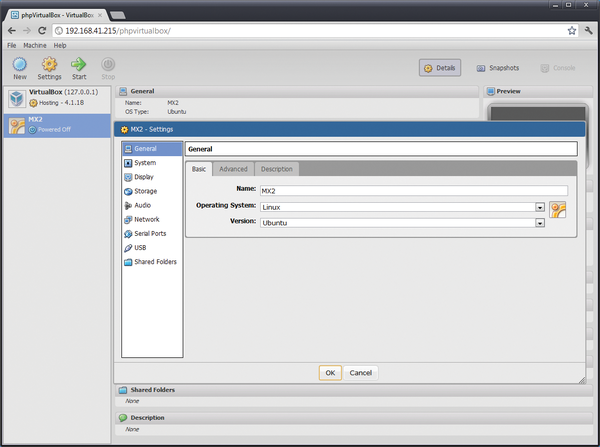 Figure 2: phpVirtualBox with its Ajax interface precisely emulates the known functionality of the native GUI.
phpVirtualBox
To communicate with the VirtualBox host, phpVirtualBox uses the Oracle SOAP interface VBoxWebSrv. In combination with a locally installed Apache2 web server with PHP 5 support, you then have a complete setup. The VirtualBox host and Apache could, in principle, be installed on two separate physical machines using phpVirtualBox. However, because Oracle's VBoxWebSrv does not provide any kind of encryption, communications – and thus transmission of the password – from the web server to the VirtualBox host would be unencrypted.
VirtualBox doesn't globally map VMs to the system, but always to the user who created the VM. Therefore, you first need to create an appropriate user and a group. In this example, the user will be vbox and the group vboxusers .
On Ubuntu, the following commands set this up:
sudo groupadd vboxusers
sudo useradd -m vbox -G vboxusers
The virtual machines are created later in the /home/vbox/VM directory. Finally, assign the new user a password:
sudo passwd vbox
Before you configure phpVirtualBox, you first need to install the Apache server, PHP, and some more packages, then set up VBoxWebSrv. To do so, create a file named /etc/default/VirtualBox with the editor of your choice and enter the user vbox in that file:
VBOXWEB_USER=vbox
Then, start VBoxWebSrv with the command
sudo /etc/init.d/vboxweb-service start
and type:
sudo update-rc.d vboxweb-service defaults
to ensure that the service also starts automatically after a reboot.
Next, install the packages required for running phpVirtualBox:
sudo apt-get install apache2-mpm-prefork apache2-utils apache2.2-bin apache2.2-common apache2 apache2-mpm-prefork apache2-utils apache2.2-bin apache2.2-commona pache2-doc apache2-suexec libapache2-mod-php5 libapr1 libaprutil1 libaprutil1-dbd-sqlite3 libaprutil1-ldap libapr1 libaprutil1 libaprutil1-dbd-sqlite3 libaprutil1-ldap php5-common php5-common php5-mysql php5-suhosin php-pear wget
Now, change directory to /var/www and download the latest stable version from the phpVirtualBox project website be typing the following at the command line:
wget http://phpvirtualbox.googlecode.com/files/phpvirtualbox-4.1.17.zip
After unpacking with
sudo unzip phpvirtualbox-*.zip
you will find a new directory named phpvirtualbox-4.1-7 in /var/www. For simplicity's sake, change the directory name to phpvirtualbox to avoid unnecessary typing later on.
Finally, you need to add the username and password to the configuration file for phpVirtualBox. Fortunately, the developer provides a suitable template that you simply copy:
sudo cp /var/www/phpvirtualbox/config.php-example /var/www/phpvirtualbox/config.php
Now add the following lines to the /var/www/phpvirtualbox/config.php file:
var $username = 'vbox';
var $password = 'Passwort-des-Users-vbox';
In your web browser, you can now surf to http://<Hostname>/phpvirtualbox to access phpVirtualBox. For the first login, the username is admin and the password admin . Next, in File | Global Settings | User , assign administrative rights to the user vbox and define a password for logging into the web interface (Figure 3). It is a good idea to delete the admin user immediately – or at least change the password to something secure. In the phpVirtualBox web GUI, you can now fully control VirtualBox over the network, just as in the native client.
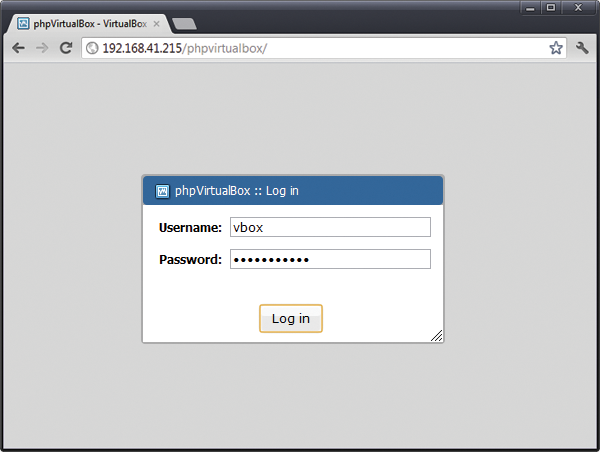 Figure 3: Setting up user vbox.
Although it is easy to work with phpVirtualBox, unfortunately the VirtualBox API does not support automatically starting and stopping VMs at system boot or shutdown time, so you must again delve into the toolbox to automate the VirtualBox host's operations as much as possible.
Hardening Apache
Communication with the web server is still unencrypted in the current state of the configuration, so you will want to encrypt the connection to Apache with SSL. To set up mod_ssl, check out the Ubuntu Server Guide [6]; otherwise, you can secure the connection to the web server with some other encryption technology, such as over a VPN. In this case, you should ensure that Apache is only accessible from localhost, not the Internet. To do so, in /etc/apache2/ports.conf, just change the entry
NameVirtualHost *:80
Listen 80
to:
NameVirtualHost *:80
Listen 127.0.0.1:80
An SSH tunnel for access to Apache, which is (now) only locally accessible, is set up easily with:
ssh -L 8080:127.0.0.1:80 user@<IP_address_of_Virtualbox_host>
Then, you can log in to phpVirtualBox by pointing your browser at http://localhost:8080/phpvirtualbox .
« Previous 1 2 3 Next »
Buy this article as PDF
(incl. VAT)
Buy ADMIN Magazine
Related content
-
Server Virtualization with VirtualBox
VirtualBox is a popular virtualization choice on the desktop. In this article, we show how you can also run VirtualBox on a Linux server – with all the comforts of a graphical user interface.
-
phpVirtualBox and RemoteBox compared
 Oracle's VirtualBox runs as an application on a host operating system, but the phpVirtualBox web interface and the native Perl/Gtk interface, RemoteBox, both make VirtualBox remotely manageable with a little effort.
 - VirtualBox 6.1.34 Is Now Available with Support for Linux Kernel 5.17
Subscribe to our ADMIN Newsletters
Subscribe to our Linux Newsletters
Find Linux and Open Source Jobs
Most Popular
Focus On Self-Hosting
• Self-Hosted Collaboration with Forgejo
• Self-Hosted PaaS with Coolify
• Build and Host Docker Images
• Self-Hosted Pritunl VPN Server with MFA
• Self-Hosted Chat Servers
Support Our Work
ADMIN content is made possible with support from readers like you. Please consider contributing when you've found an article to be beneficial.
